And we are … live! Here it is, in all its glory :-)
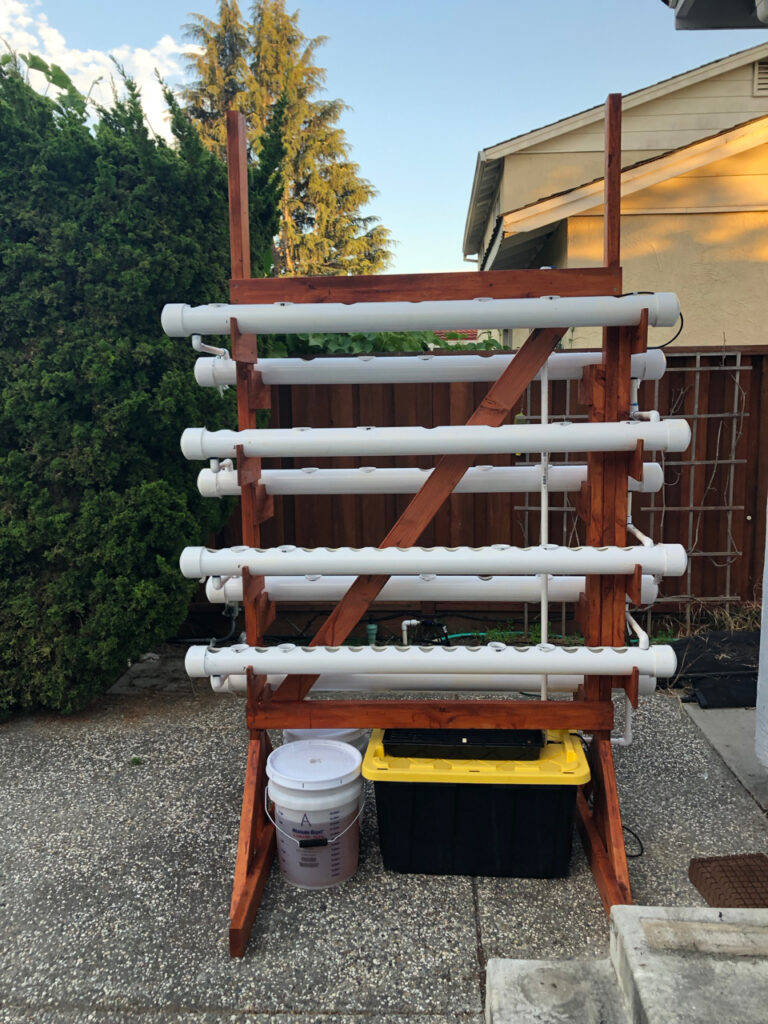
A few months ago, considering the deteriorating state of our planet, I decided I want to know more about how food grows (or fails to grow). So I started to read up on hydroponics. And a few weekends ago, I started building. Today, with the plant food mixed into the water, the pump turned on, and some little lettuce plants in their little baskets, we are officially on!
First, let’s give credit where credit is due. This year at Maker Faire, again I admired the hydroponics installations by Bruce Gee. I think I had seen his work at another Make Faire a few years ago before. From what I can tell, he has done a substantial amount of work on various backyard hydroponics systems, and best of all, he has documented some of them in detail on his great site waterworks-hydro.com. Given that I am a complete novice on the subject, I figured it would be easiest to copy one of his designs to get started. “Experience is cheapest second-hand”, as it is said. And so if you compare my system with his Maker Faire 2019 Vertical system, you will see they are virtually identical.
If you are new to hydroponics, here is how it works:
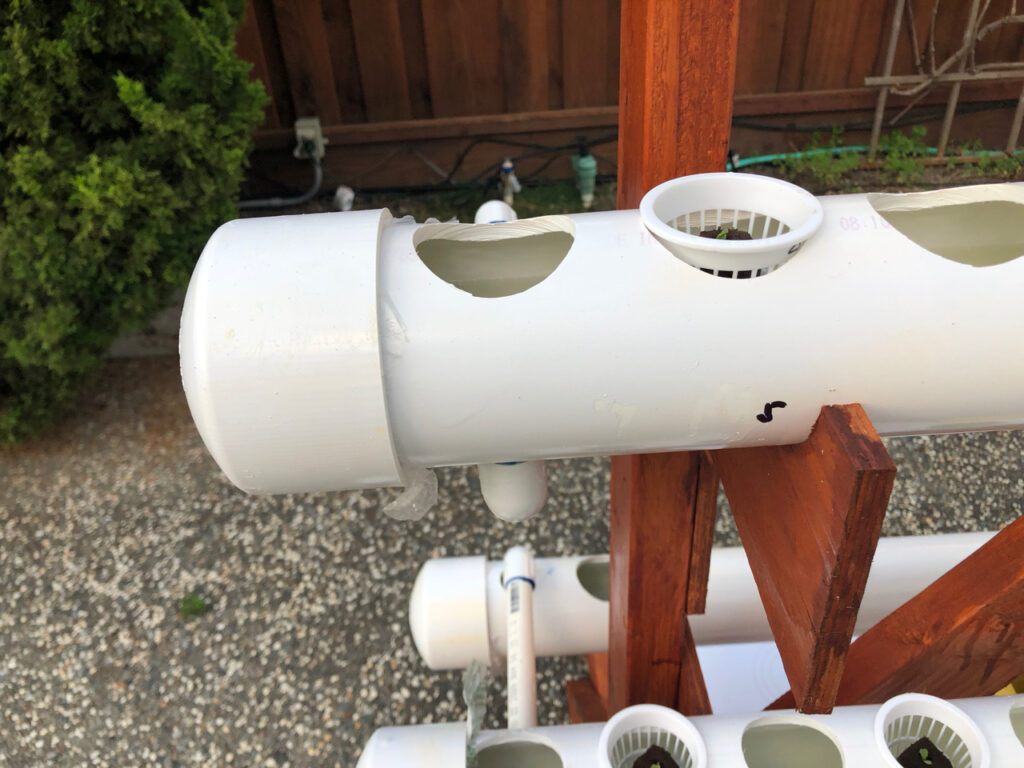
- The plants sit in little baskets in the round holes in the horizontal pipes. You can’t quite see them in the above picture because they are still smaller than the basket is high.
- The plants’ roots hang into the water that slowly moves by them. Well, the water is not just water but also dissolved nutrients. There is no soil.
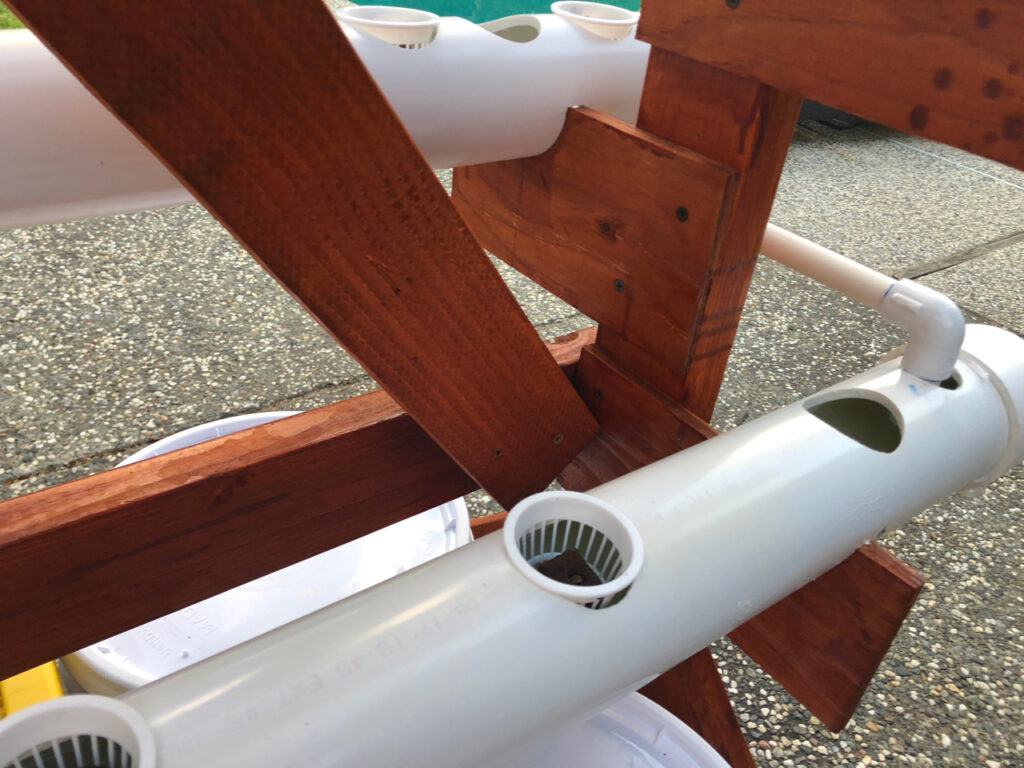
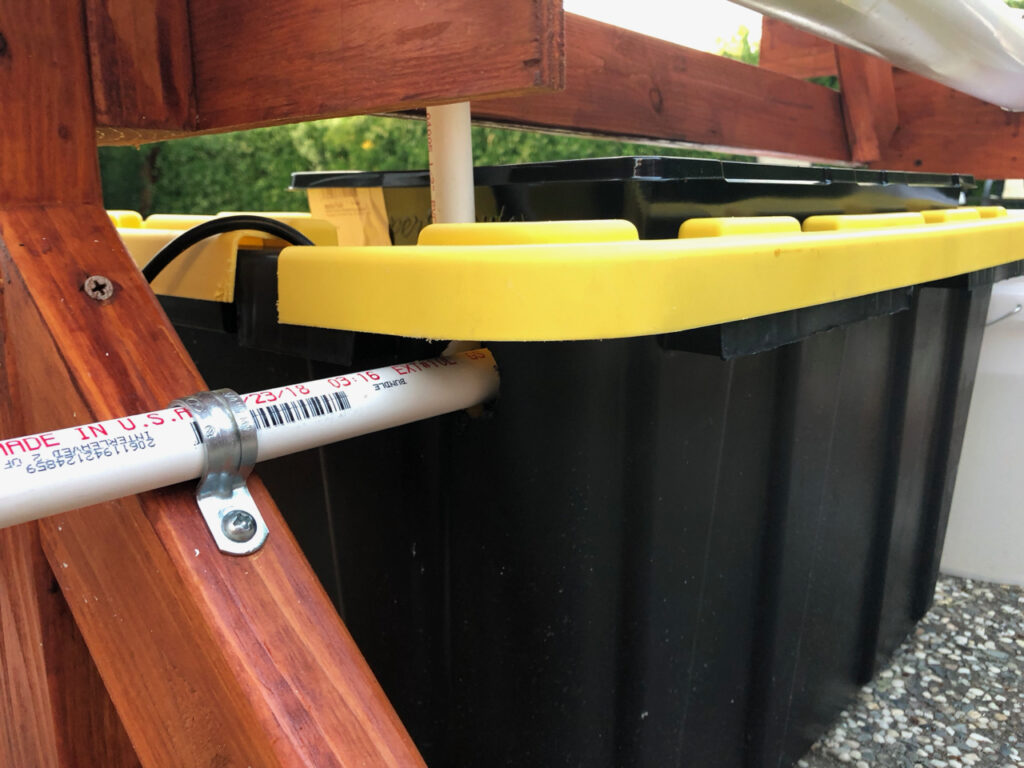
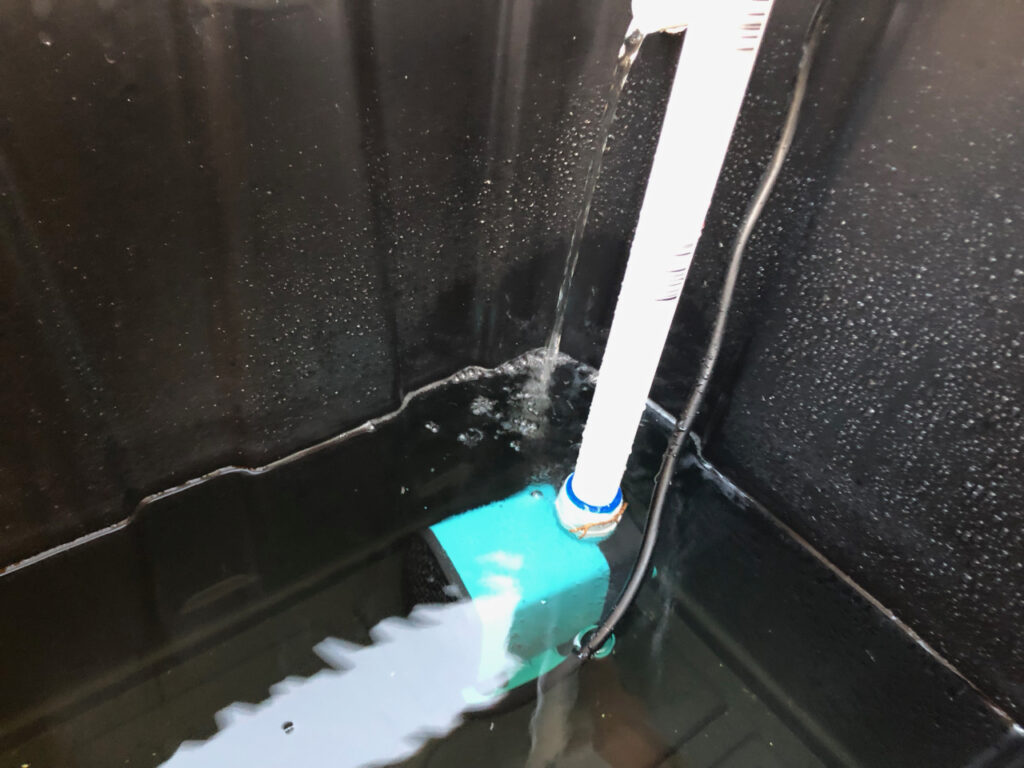
- The eight (four on each side) horizontal pipes holding the plants are daisy-chained into a zig-zag run for the water that starts with the thin black tube at the top, and ends at the bottom in the black container with the yellow lid.
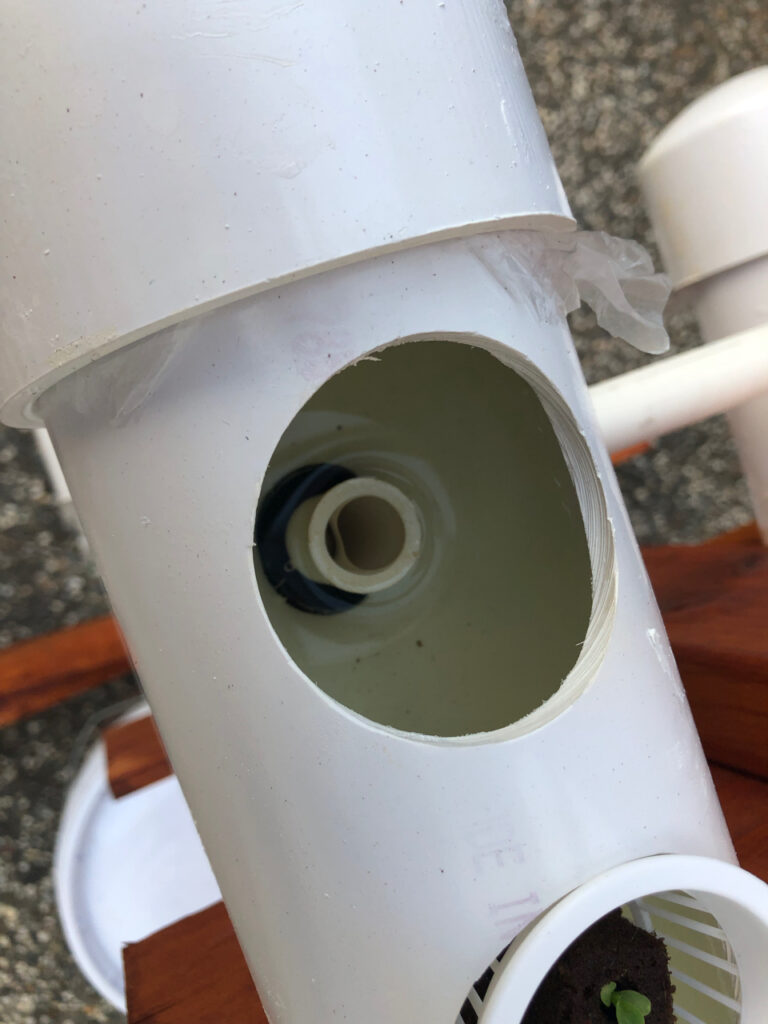
- The thinner white pipes are stuck into the thick ones so that as soon as the thick pipe has the right water level for where the plants need it, it overflows into the pipe below.
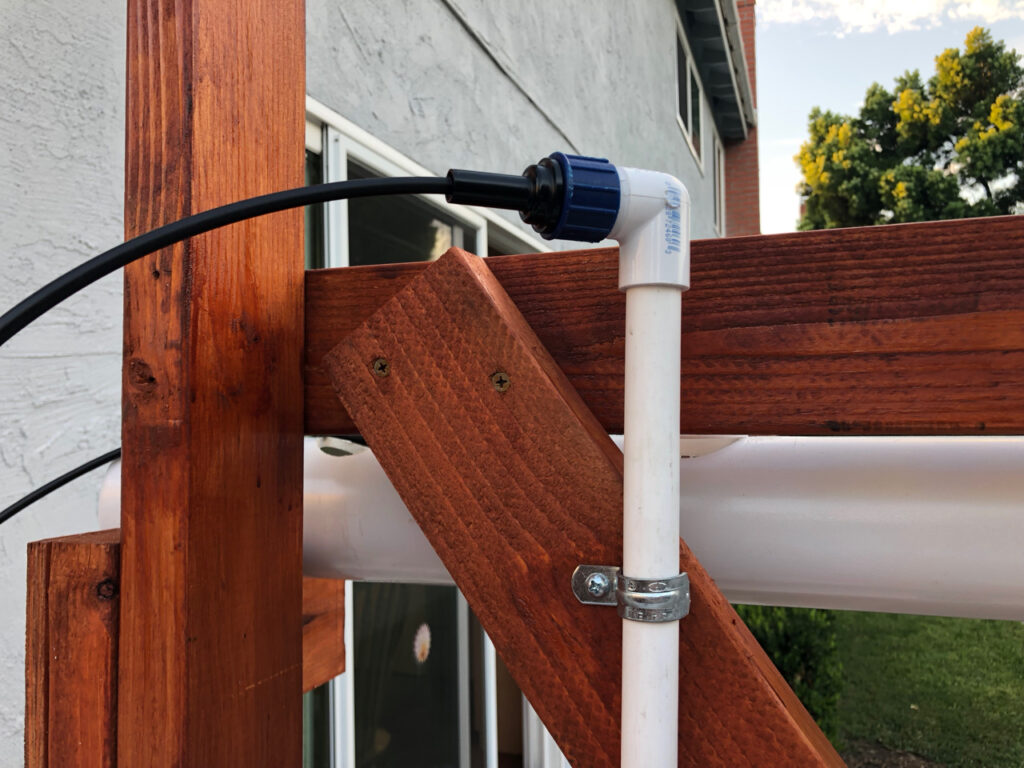
- The black container holds water with dissolved nutrients. It also contains a submerged little pump that pumps the water back up to the top of the system through the vertical white pipe right of center.
- The two buckets on the left contain the plant food ingredients, and are just there to be out of the way.
Here are some more detailed pictures:

Please pardon my lack of craftsmanship. This system was slapped together in relative hurry. For one, the season is getting late even in California! And secondly, my goal here is to experiment, so, time permitting, I would expect to change and rebuild the system in different ways; work in progress, rather than craftmanship, in other words.
Here are some of the differences to Bruce’s system:
- I use 8 horizontal pipes, not 7 (from 4 x 10ft pipes, each cut in half)
- The bottom two rows on one side have less space between the cutouts; they are intended for young plants.
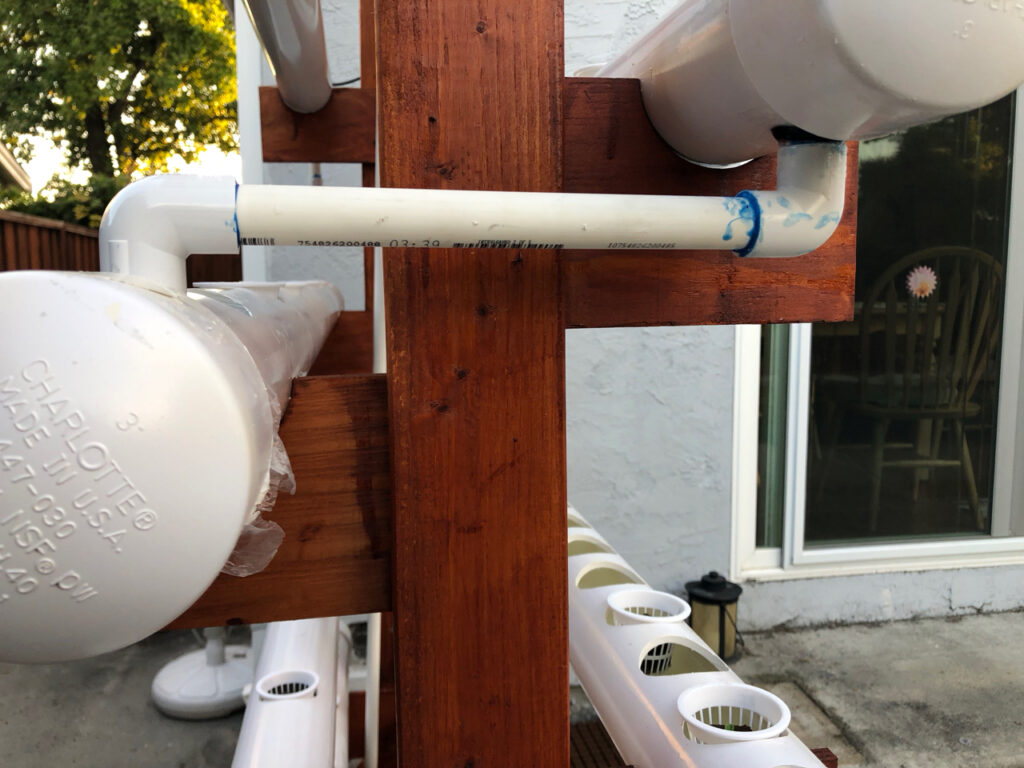
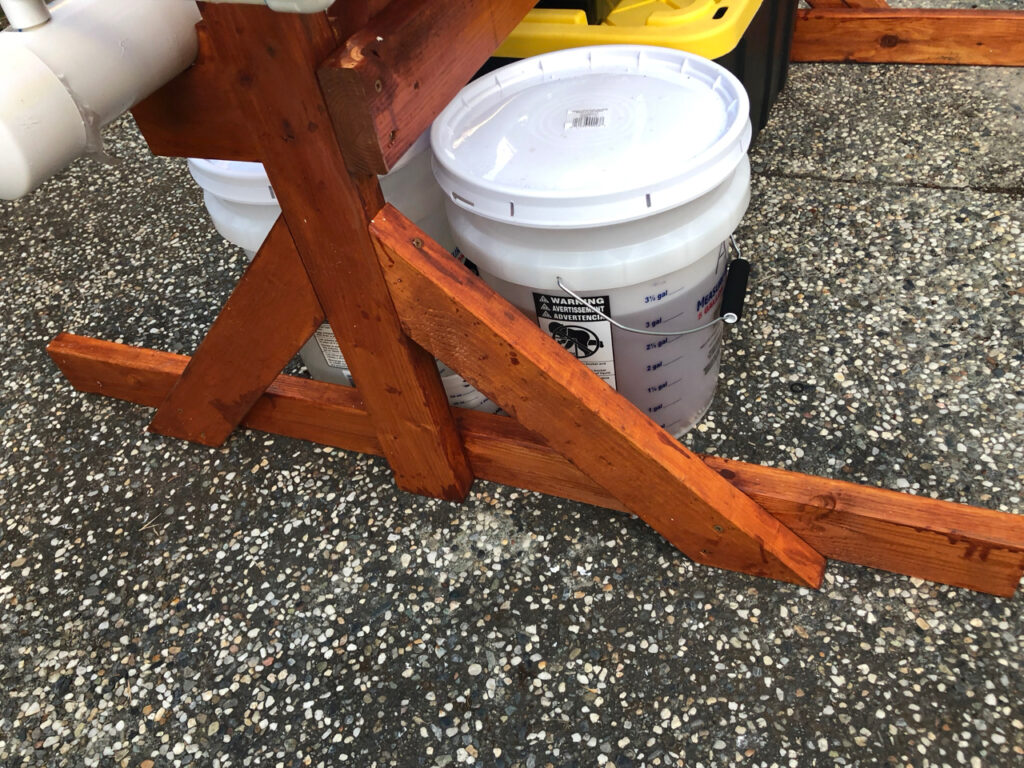
- I added some struts to the feet and the core of the structure. This should substantially reduce the forces on the joints between the 2x4s. I figure the whole project was enough work that I would not want it to be destroyed easily in a storm or just because somebody tumbles into it by accident.
- One side of the supports for the horizontal pipes is adjustable. It was little extra work to add this flexibility, but I figured flexibility is good for an experimental system. If nothing else, it lets me get the pipes horizontal if the system is positioned on ground that’s not entirely flat.
- I needed to use a lot more caulking than Bruce apparently did. I suspect that’s because I failed to find any schedule 20 piping, as he recommends, and the grommets and the schedule 40 piping do not get along so very well.
One thing that’s unusual about this hydroponics project is that it is built in some form of “open-source style”: the original author (Bruce) created something, and released it to the world by showing it at Maker Faire and documenting it on his website. Then some other guy comes along (me) who also wants a hydroponics system, and instead of figuring it out himself, uses the already existing, documented design, and (attempts to) improve on it. And while I don’t plan to exhibit at Maker Faire or such, I am writing this post, and perhaps more in the future, to help the next guy (or gal! Preferably!) build a system that incorporates all the lessons of the people that came before them, and thus they can spend their time on even more improvements. So over time, the design will become better, and everybody benefits.
Now right now, this design doesn’t have a git repo, or a public bug tracker, so it’s only sort-of open-source. But perhaps we should create those? Does anything like this exist already anywhere?
It also occurs to me that open-source ideas could also apply to the operation of the system, not just the design. What if we document the operations and build on each other’s work in the same way? Some guy might figure out that plant productivity is 10% better if one shields the plants from direct sunlight between 11am and 2pm. I don’t know whether that would improve productivity or not, I’m making this up — but it would be cool if I could follow the process of somebody who has already figured it out, documented it, and I could benefit from it without needing to figure it out myself. I might figure something out myself, share it, and they would benefit. Open-source style collaborating doesn’t need to be limited to software, does it?
Comments
6 responses to “My DIY backyard hydroponics system”
Mentions