(See post on the why of this project. In this post, I describe how I arrived at the picking the parts that I did, assuming it might be useful for others considering similar projects.)
I start by investigating suitable hardware platforms, and quickly figure it will have to be either an Arduino or a Raspberry Pi. Both have easy-to-use I/O pins that I could use. I decide in favor of the Raspberry Pi, because it lets me run a full-fledged Linux installation called Raspbian that is similar to debian, which I’m very familiar with, and for which I know I can easily write some software. Networking shouldn’t be a problem because the complete Linux networking stack is available including web languages such as PHP running under Apache. For the Arduino, I would have to learn their programming language, and I would have to proxy it with a website running on some other server because, as far as I can tell, ethernet and WiFi support is rather low-level and I can’t really run an entire webserver with custom CGI code on it directly. (Later I realize that Raspberry Pi and WiFi might actually be cheaper, too.)

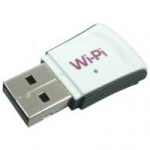
To connect, using Ethernet or any kind of cabling seems like a bad idea: the pool control panel is outdoors, I would have to string wires, and who knows what kind of interference I might be getting, not to think of high-voltage pulses in adverse weather. So it must be Wi-Fi, and I quickly find this rather cute Wi-Pi USB dongle that’s made specifically for the Raspberry Pi.

Next I look into relays. (Final parts list will be a separate post.) Turns out the Raspberry Pi only wants to emit a few milli-amps from its GPIO pins, and I have 240V to switch at 1 hp. I’ll look around and find some Deltrol relay that can switch this voltage and power, and can be easily attached to a box with its flange. But it requires at least 12V to drive, taking 125mA. The Raspberry Pi outputs 3.3V, and it cannot provide 125mA in any case. So we’ll need a transistor stage in between that provides enough power for the relay, can be driven by the 3.3V of the GPIO pin, and provides those 12V to the relay.
I’m surprised I don’t find ready-made transistor/relay modules for the Raspberry Pi. Compared to the Arduino ecosystem, there still seems to be very little ready-made accessory hardware. Even connecting cables to the pins on the board is not so straightforward: many trips to Fry’s don’t ever produce a really good way of doing it. That’s probably because the Raspberry Pi is still relatively new, and the ecosystem is still fairly immature. Nothing fatal though.
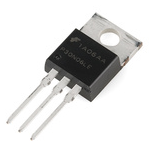
 So I read up on what others have done, and settle on a simple field-effect-transistor (MOSFET) stage: MOSFETs have the (miracle, it seems!) property of being able to switch rather large currents without taking any current in themselves. Well, it’s so miniscule that for all practical purposes, it’s zero, which removes all worries that the Raspberry Pi’s CPU will be overloaded. I pick a more or less arbitrary type; there are many that would work.
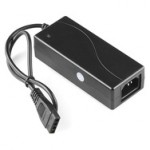
 Now, power: For the Raspberry Pi board itself, I need 5V DC, preferably via an USB mini plug. The relays need 12V DC. I find a cheap Chinese-made power supply that provides both. I have no idea what it was made for, but I can simply take it out of its enclosure, and solder on whatever cables I need. I’m a bit concerned about power quality, but figure I’ll have to try. (It worked.) It later also turns out that the board contained in the power supply does not have any mounting holes; I have to drill some holes at some “empty” space on the board. Fortunately it’s a very simple board and I’m not in danger of actually breaking anything.
Finally, a trip to Fry’s and the local hardware store for the necessary assembly hardware. (Actually, I lied, it takes many trips to find just the right parts after previous ideas don’t seem so bright when attempting to use them.) As so often for projects like this, it takes more time and energy to find the boxes and bolts and plugs than to find the electric components. Same for assembly: I’m taking longer to drill and file holes into sheet metal than soldering wires. Somebody should invent something about that … I end up with:
- A metal box about 8in x 5in x 2in that fits all parts (barely).
- A small prototyping board that will hold the MOSFETs and supporting components.
- A bunch of plastic bolts to mount boards inside the box: life is too short to accidentally connect something in final assembly.
- Some female headers so I don’t need to solder anything directly to the Raspberry Pi board.
- A cheap mini-USB chord to cut and get the mini-USB plug from. (I fail to find the plug on its own at Fry’s.)
- Some thin wiring for low-voltage connections in the box, and 16-gage stranded wire for the switched connections to the pool pumps.
- Some insulated terminal connectors to plug into the relays.
- A USB extension chord to use with the Wi-Pi in case the inside of a metal box (mine) inside a metal box (the pool control box) gets in the way of the Wi-Fi. (It turns out later that it indeed does.)
Go to the next post on setting up the Raspberry Pi itself.