Updated 2017-12-21: Now with added pictures about placing a disk into the box as well.
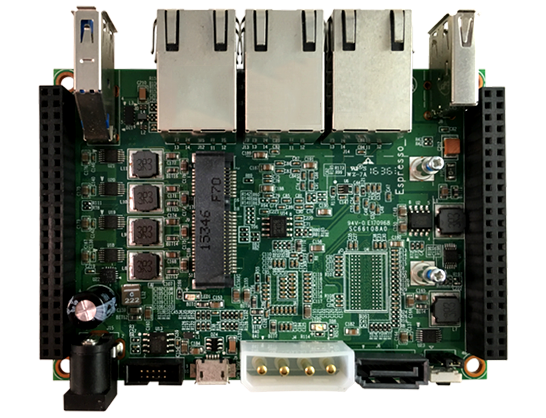
The ESPRESSObin is a quite nice ARM board that comes with a SATA port. So it should be ideal for using it as a little home server. Except, because it is a development board, they don’t provide an enclosure that can fit a disk, so your server will end up as too many fragile parts splayed all over your desk to be reliable.
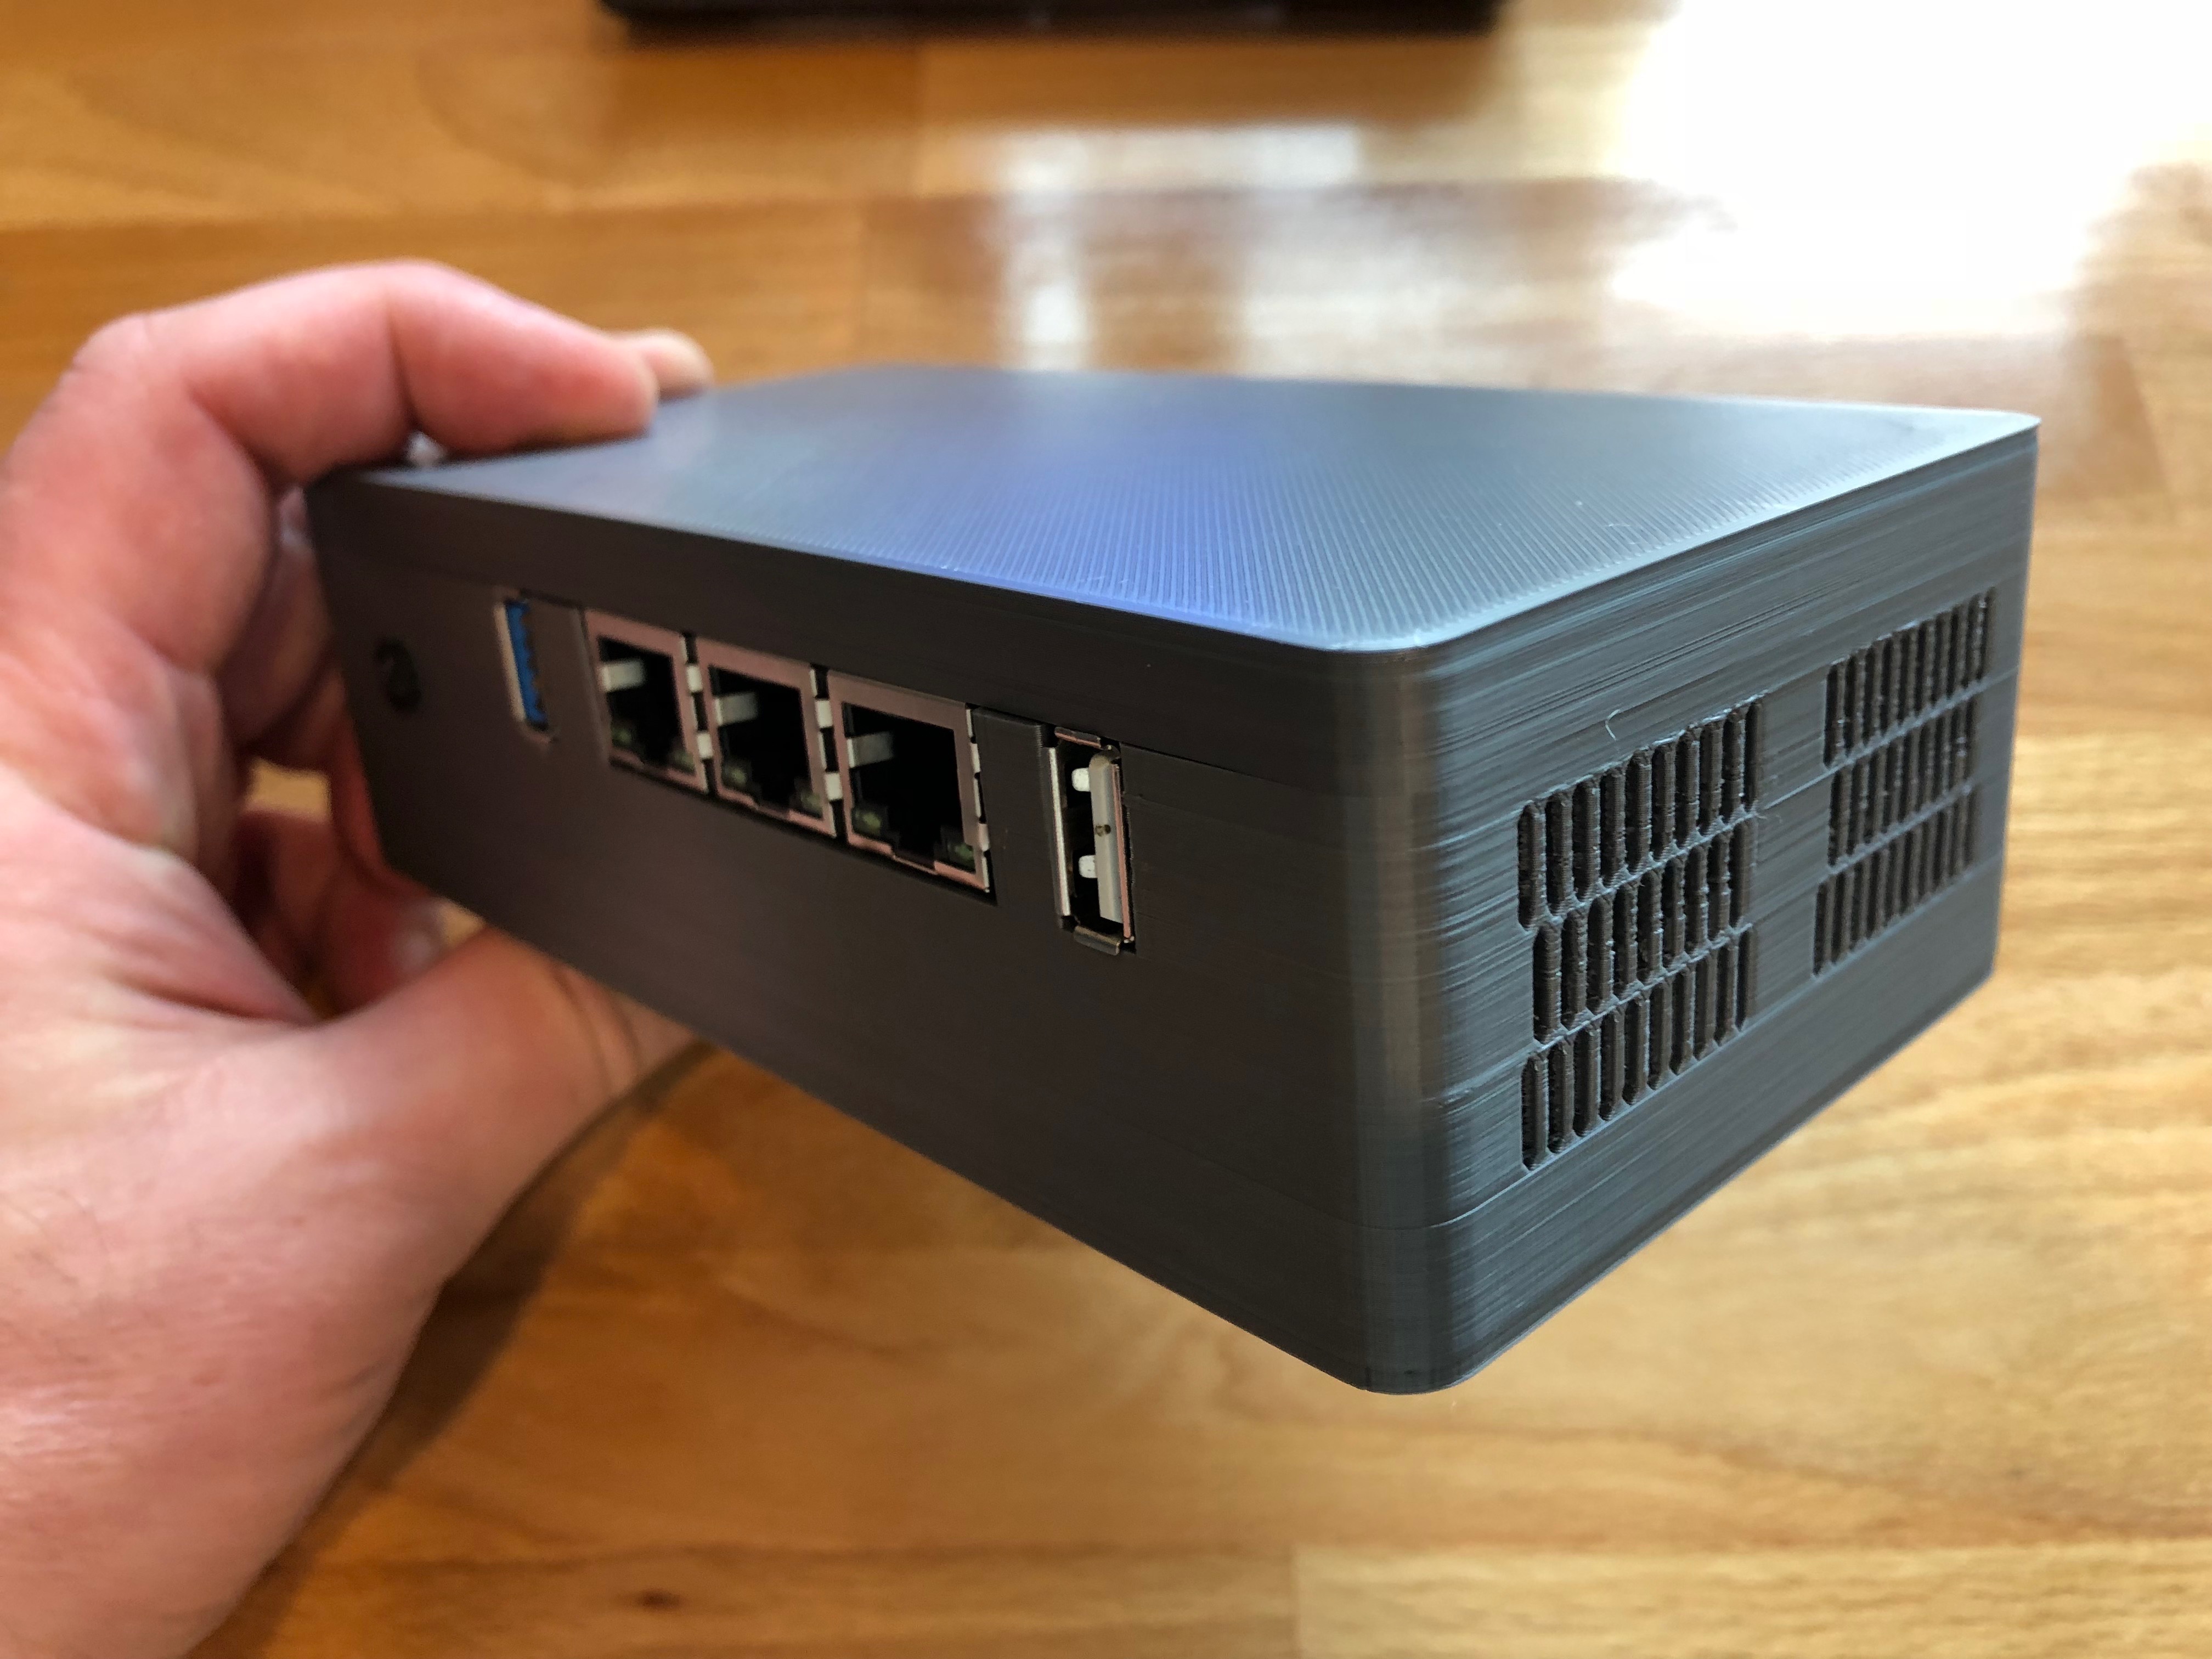
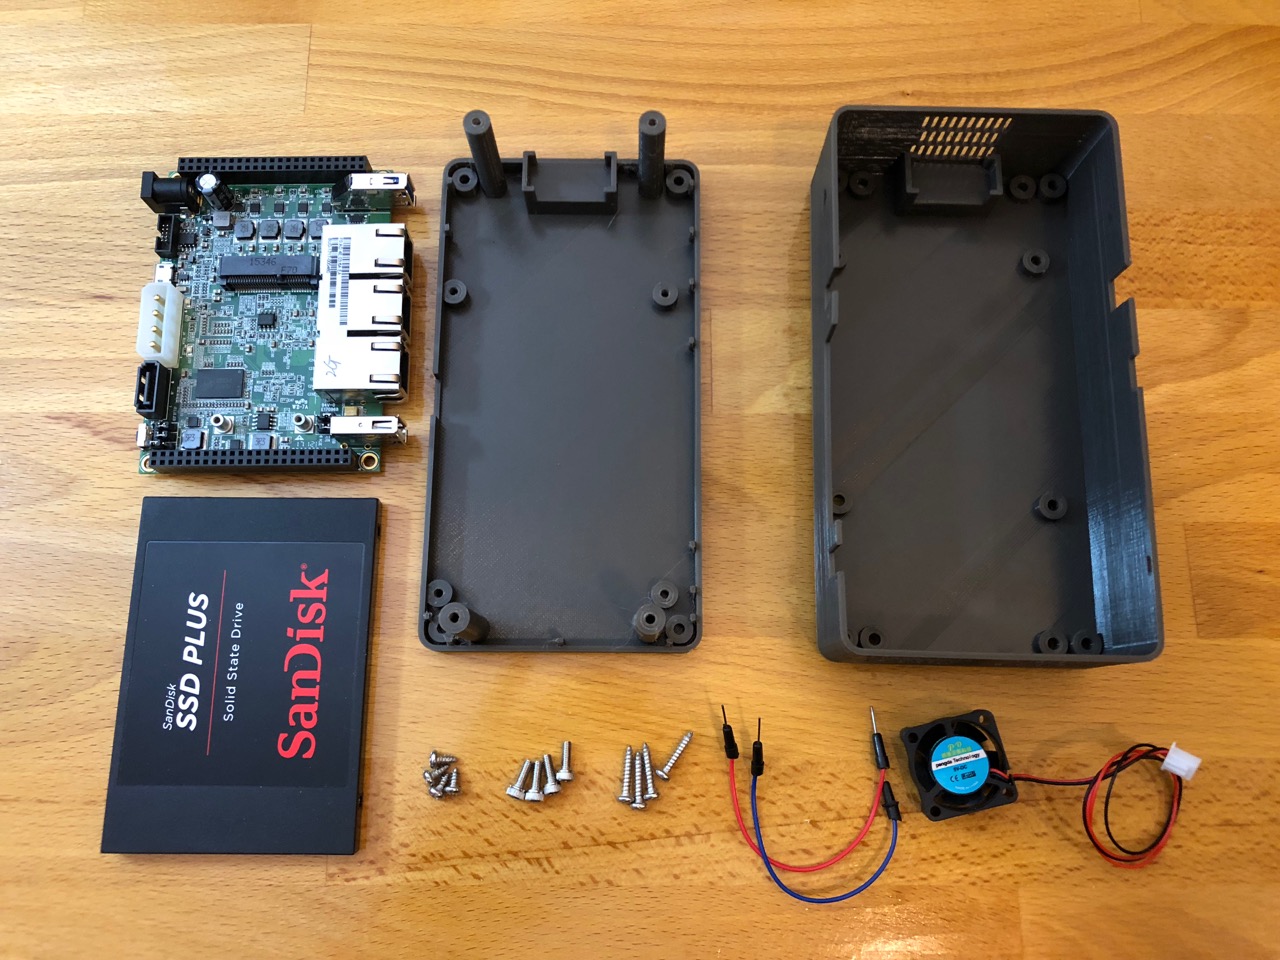
So I powered on OpenSCAD and my 3D printer, and created a box for it. Here it in in all its glory:
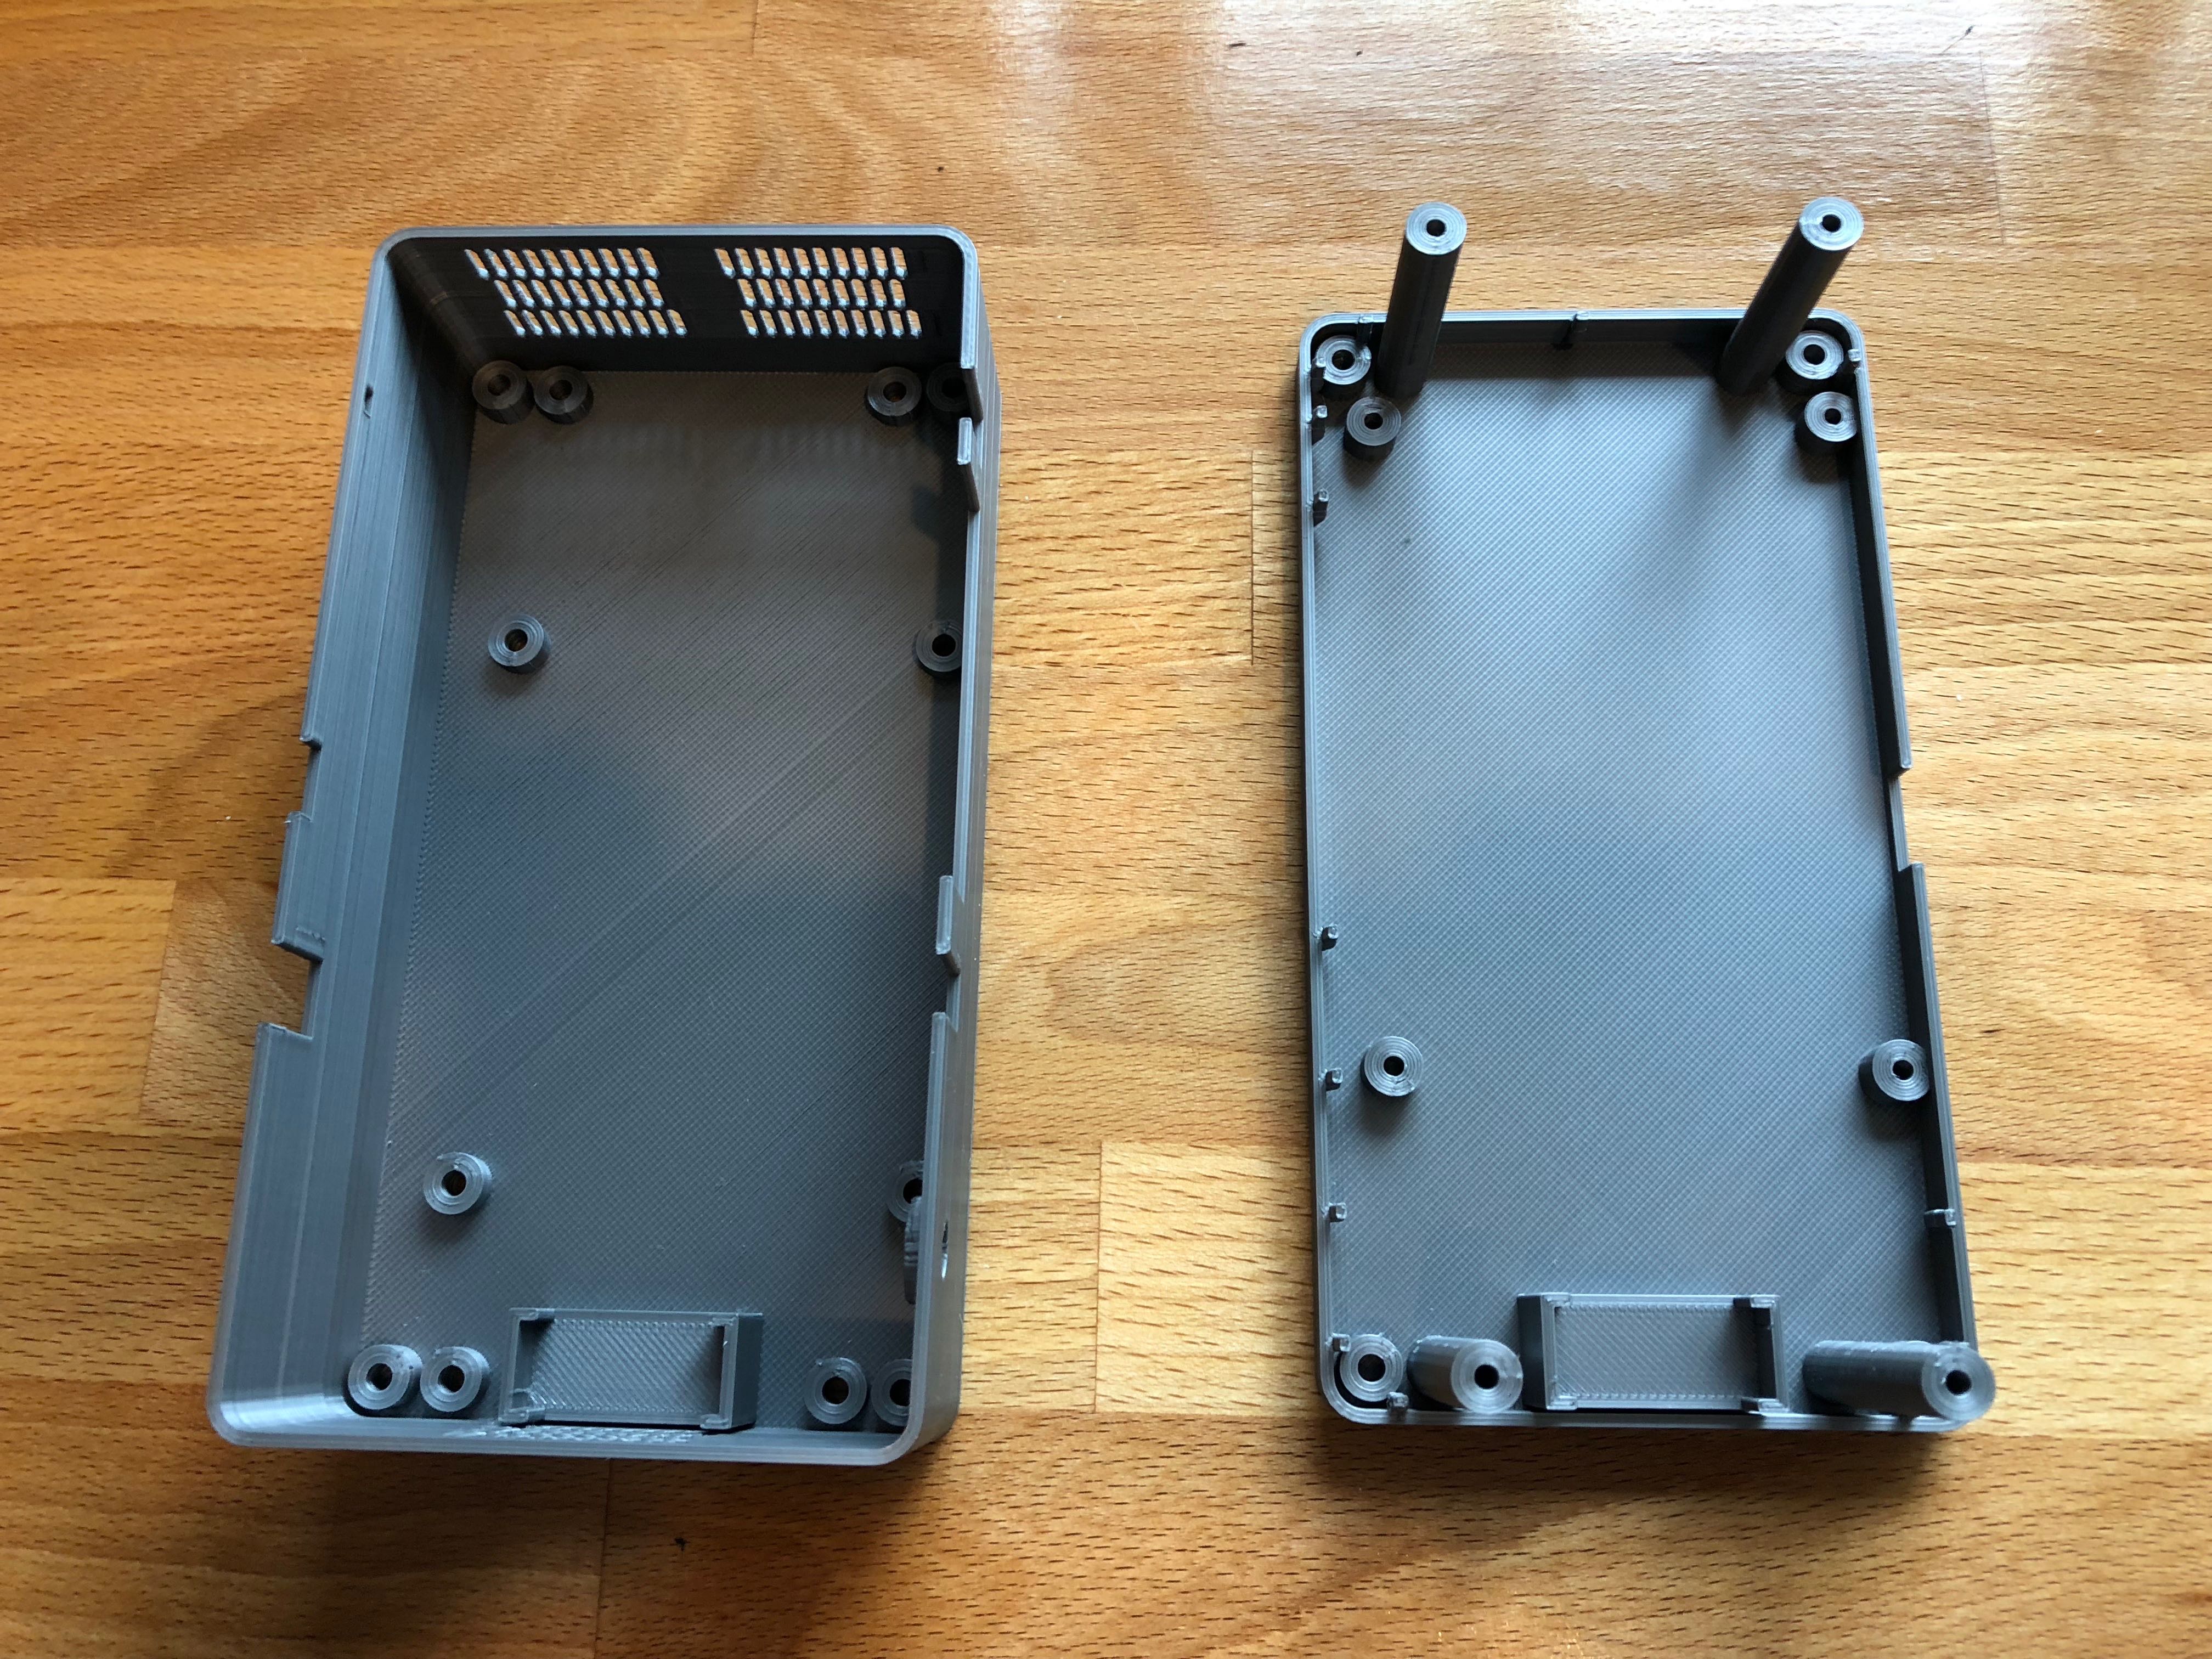
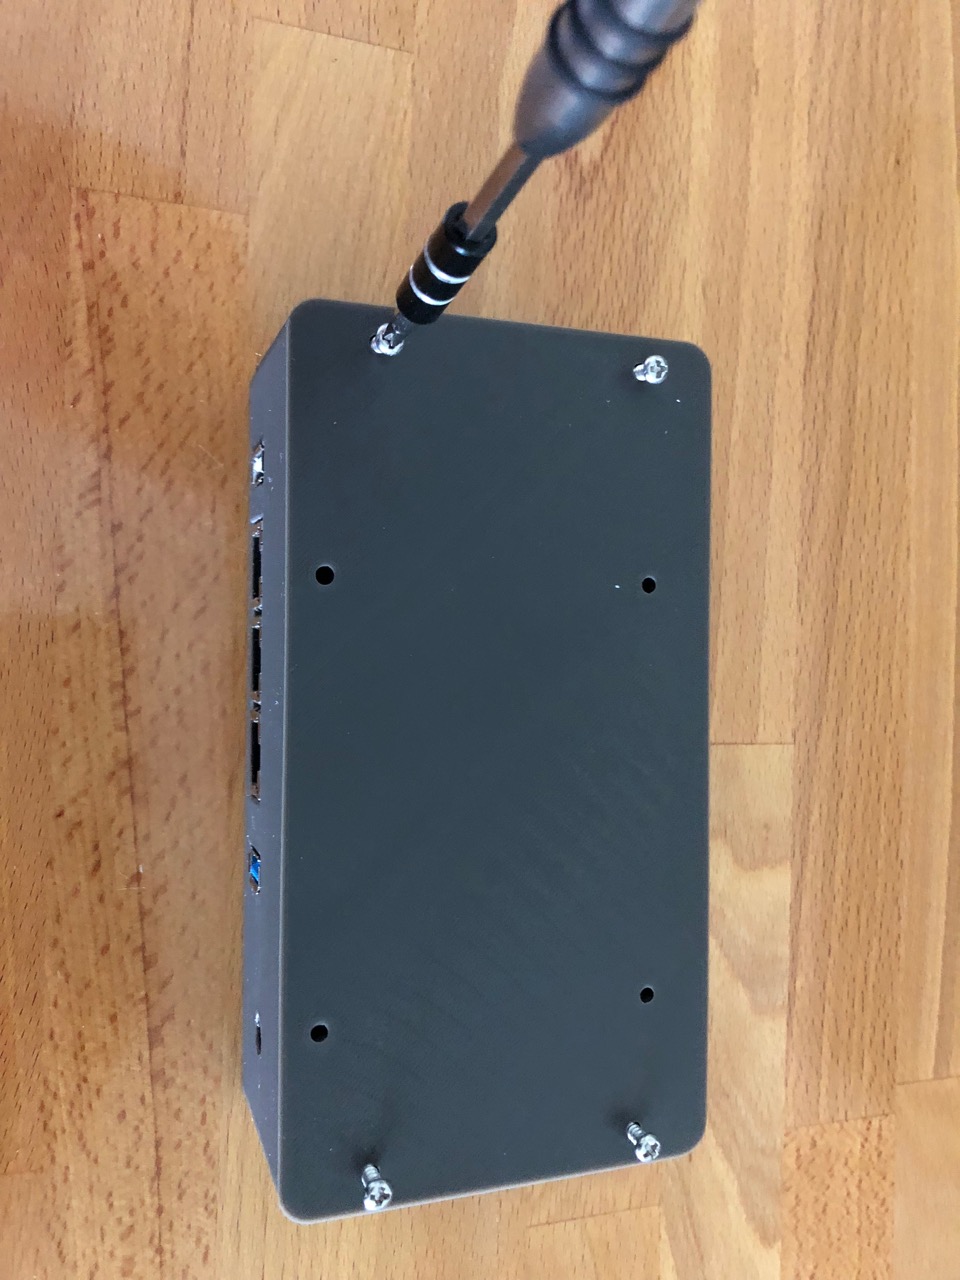
You can simply print the two halves of the box, attach the board to one half and a 2.5 in (notebook) disk to the other half, and screw the two halves together. It only takes a few M3 screws. Best are:
* 4x M3x6 self-tapping for attaching the board to the enclosure
* 4x M3x14 (or M3x12) self-tapping for attaching the two halves of the enclosure to each other
* 4x M3x8 for attaching the disk.
However, experience has shown that the board can get hot, so the enclosure also has room for a 25x10mm fan. If you buy a 5V fan, you can power it directly off the ESPRESSObin’s 5V pin exposed on the header that’s closest to the fan.
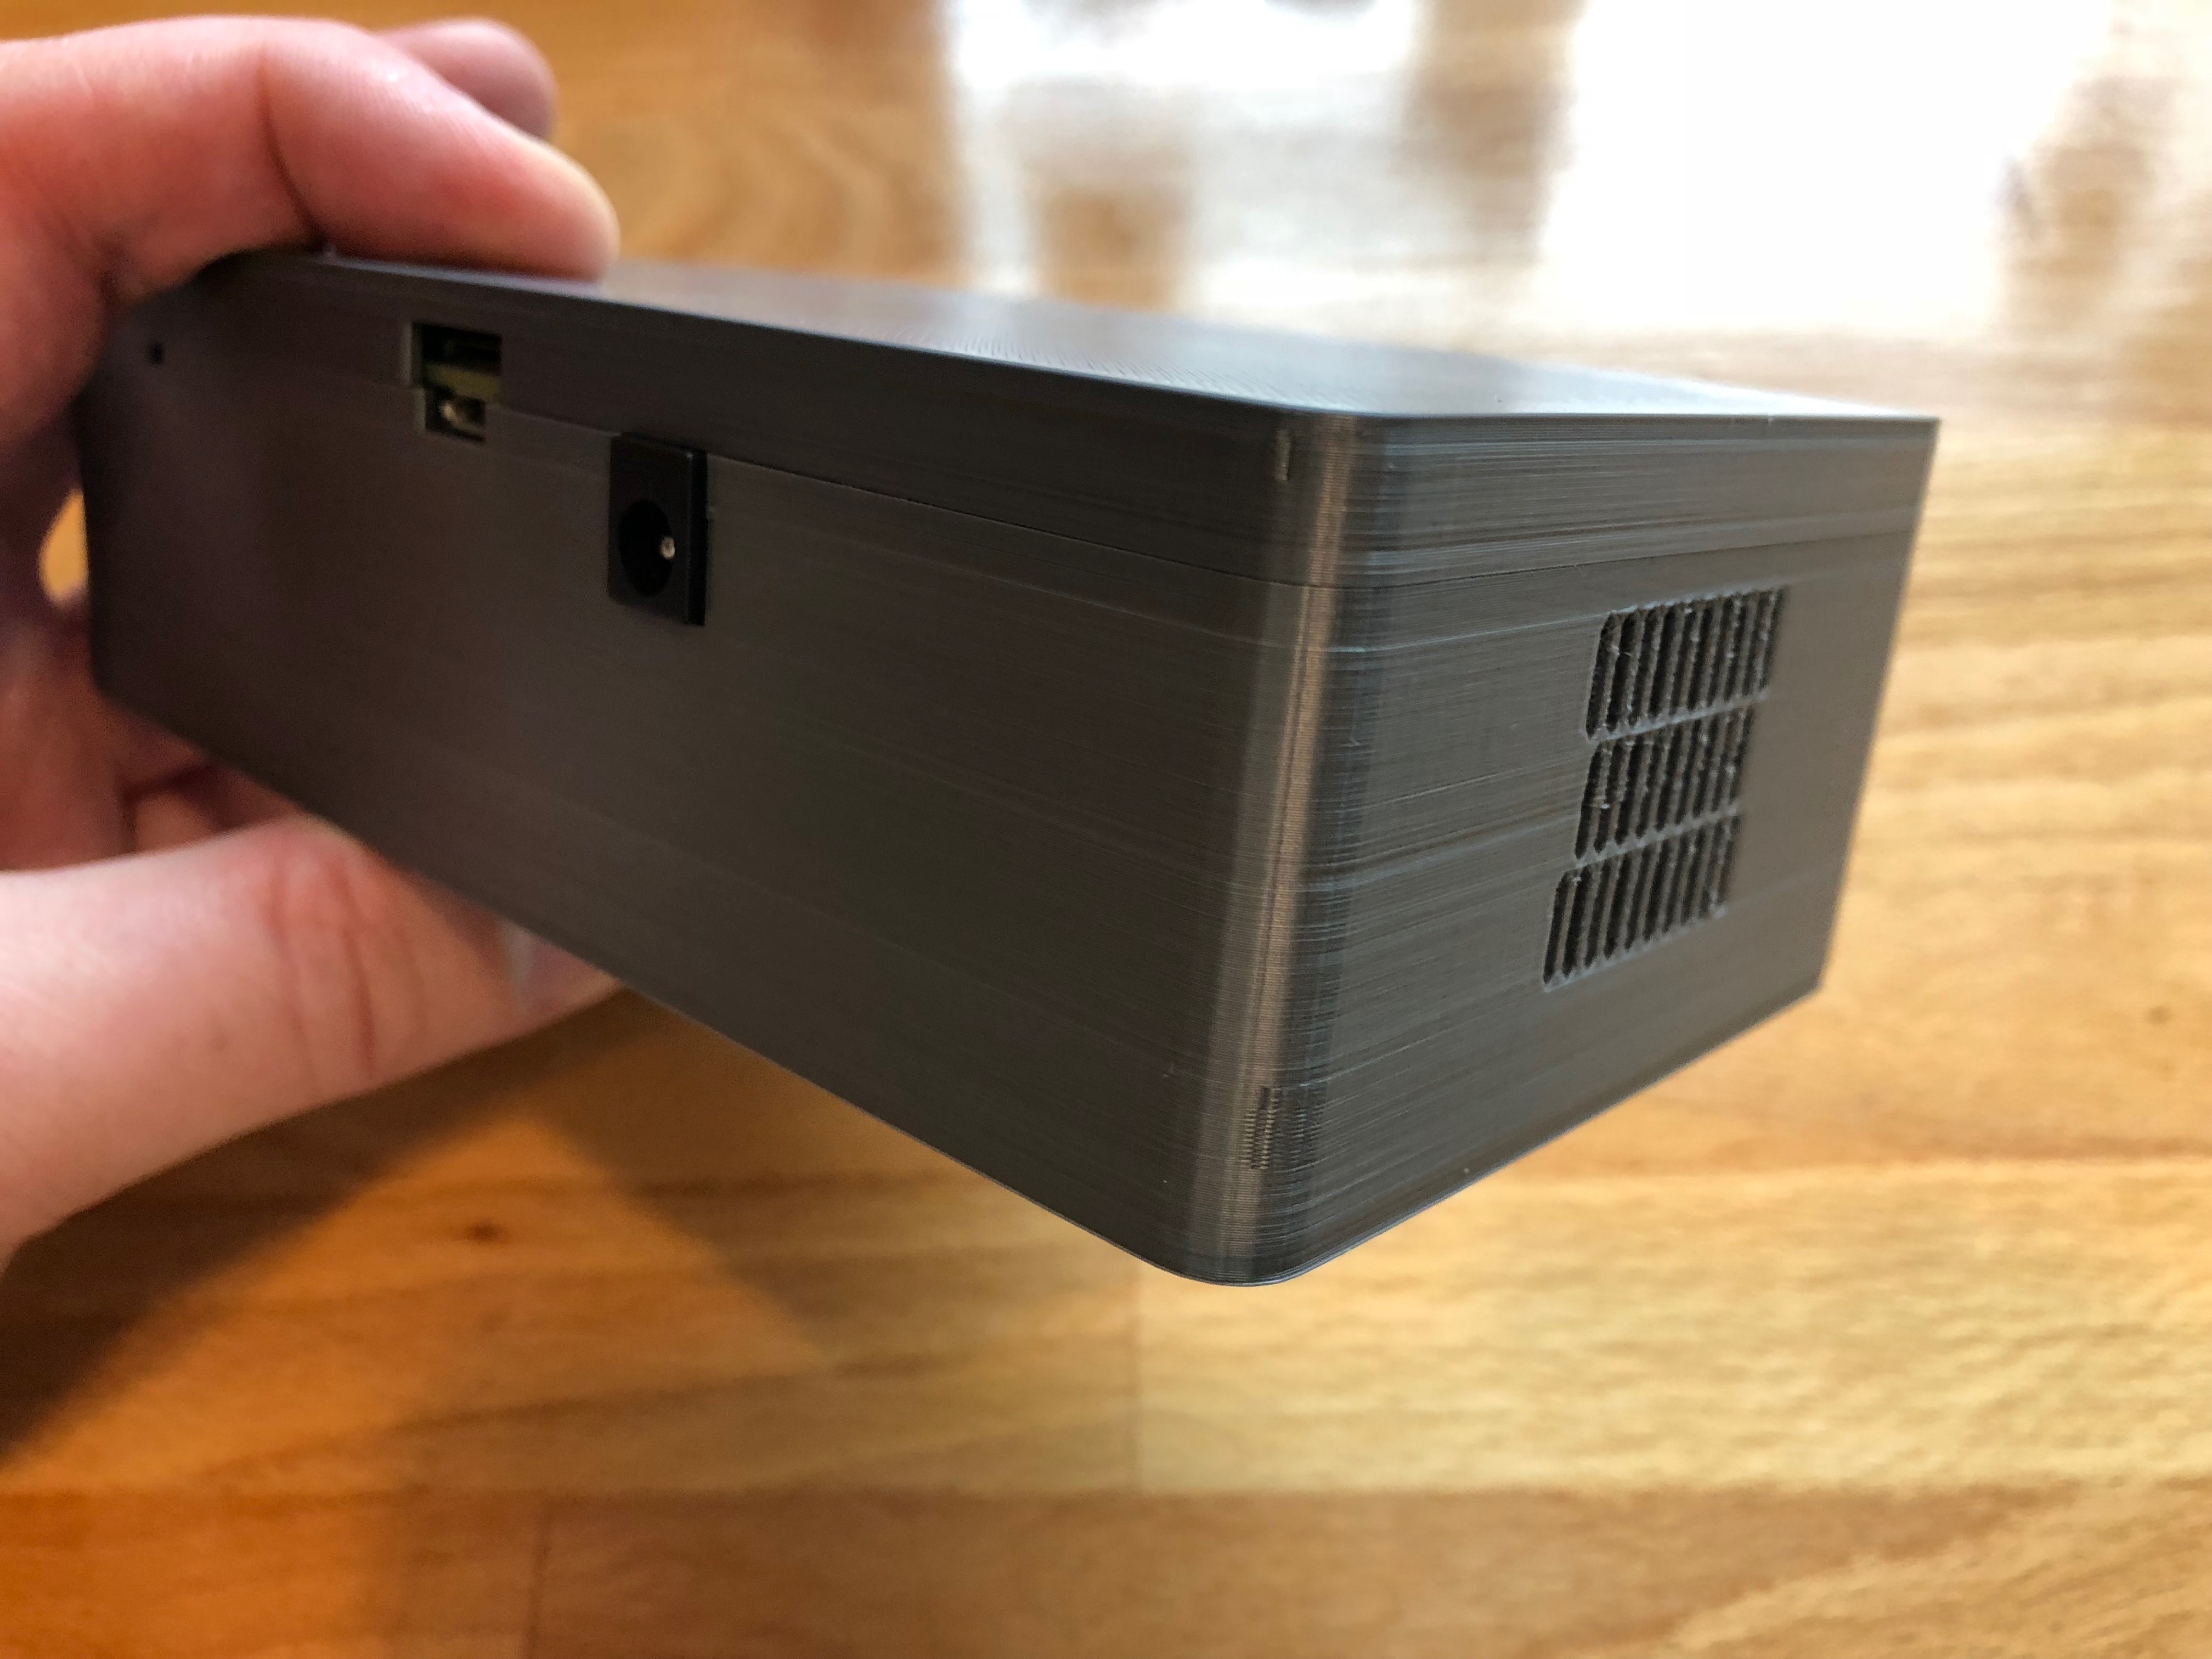
There is also a hole for a 5mm LED inside one of those plastic LED holders. I am using an RGB LED that is blue by default, and changes color once the ESPRESSObin has booted. (Currently I’m trying to also make it change color when the ESPRESSObin has connected to the network, but I’m still working on that, so no pictures on that yet.)
You can get the OpenSCAD files from Github at https://github.com/jernst/espressobinbox. You need all of those files. The main file is, not surprisingly, called ESPRESSObinBox.scad. There are comments in the code, so it should not be too hard to make changes if you feel like it, such as removing the LED hole if you don’t want an LED.
If you are just looking for the STL file, I uploaded that to Thingiverse at https://www.thingiverse.com/thing:2707086.
 Oh, and if you need an easy-to-install operating system and apps, consider UBOS, which runs nicely on the ESPRESSObin. It configures the ESPRESSObin as a router (with firewall and DNS etc) out of the box, and it lets you install complex web apps like Nextcloud with a single command.
More pictures of the assembly (with fan, but without disk and LED).
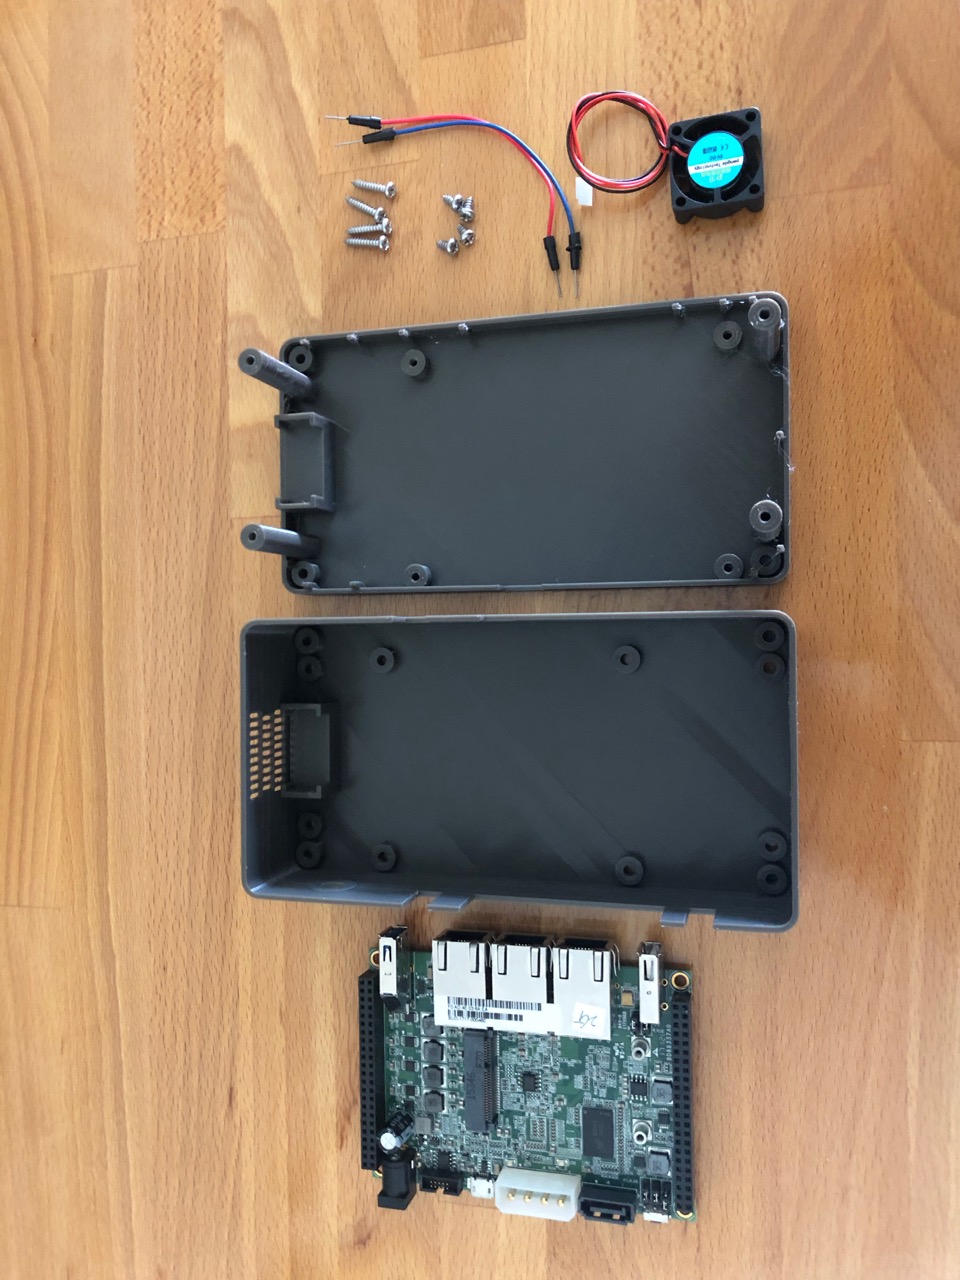

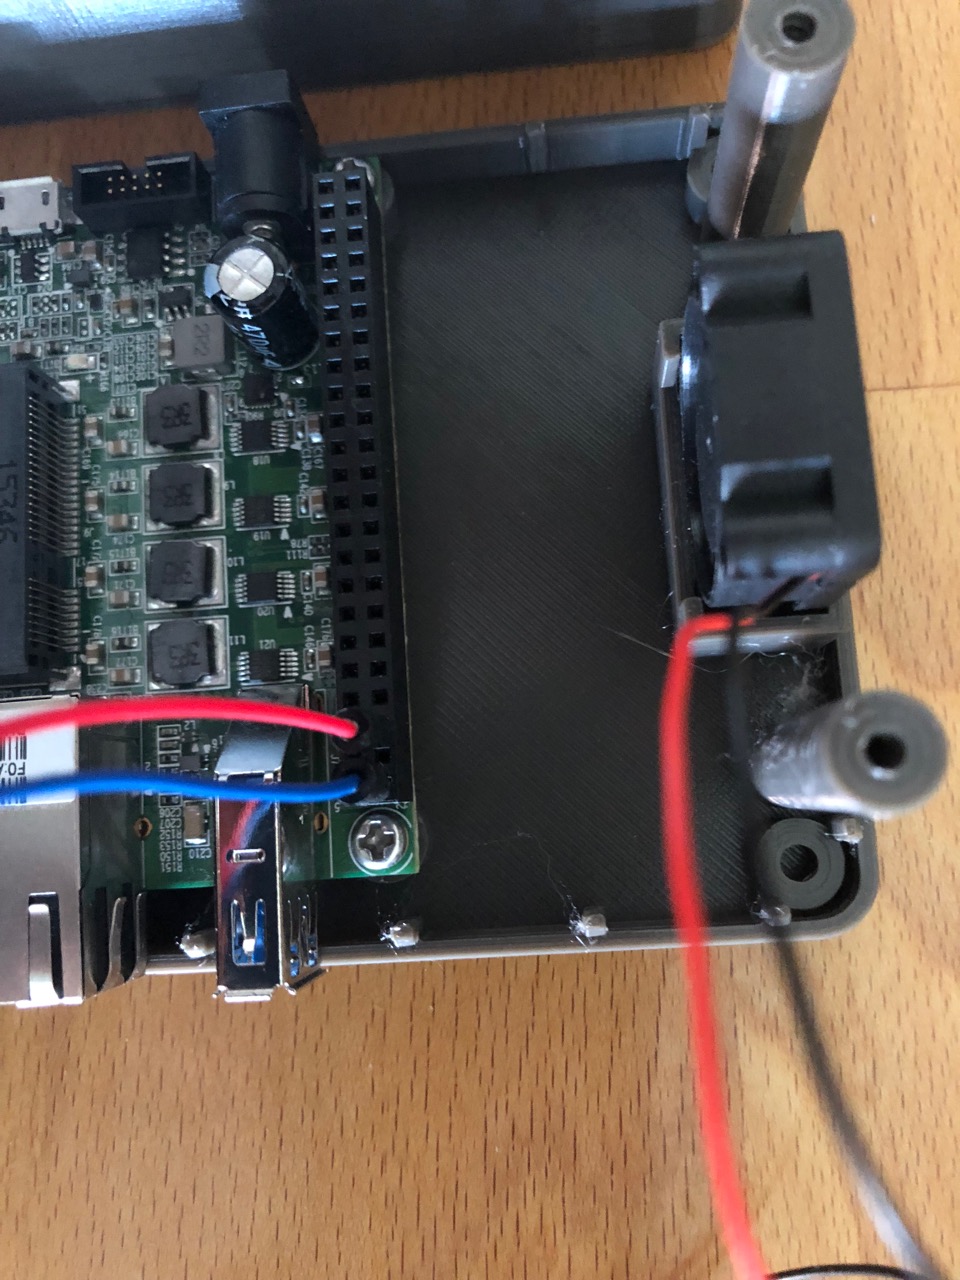
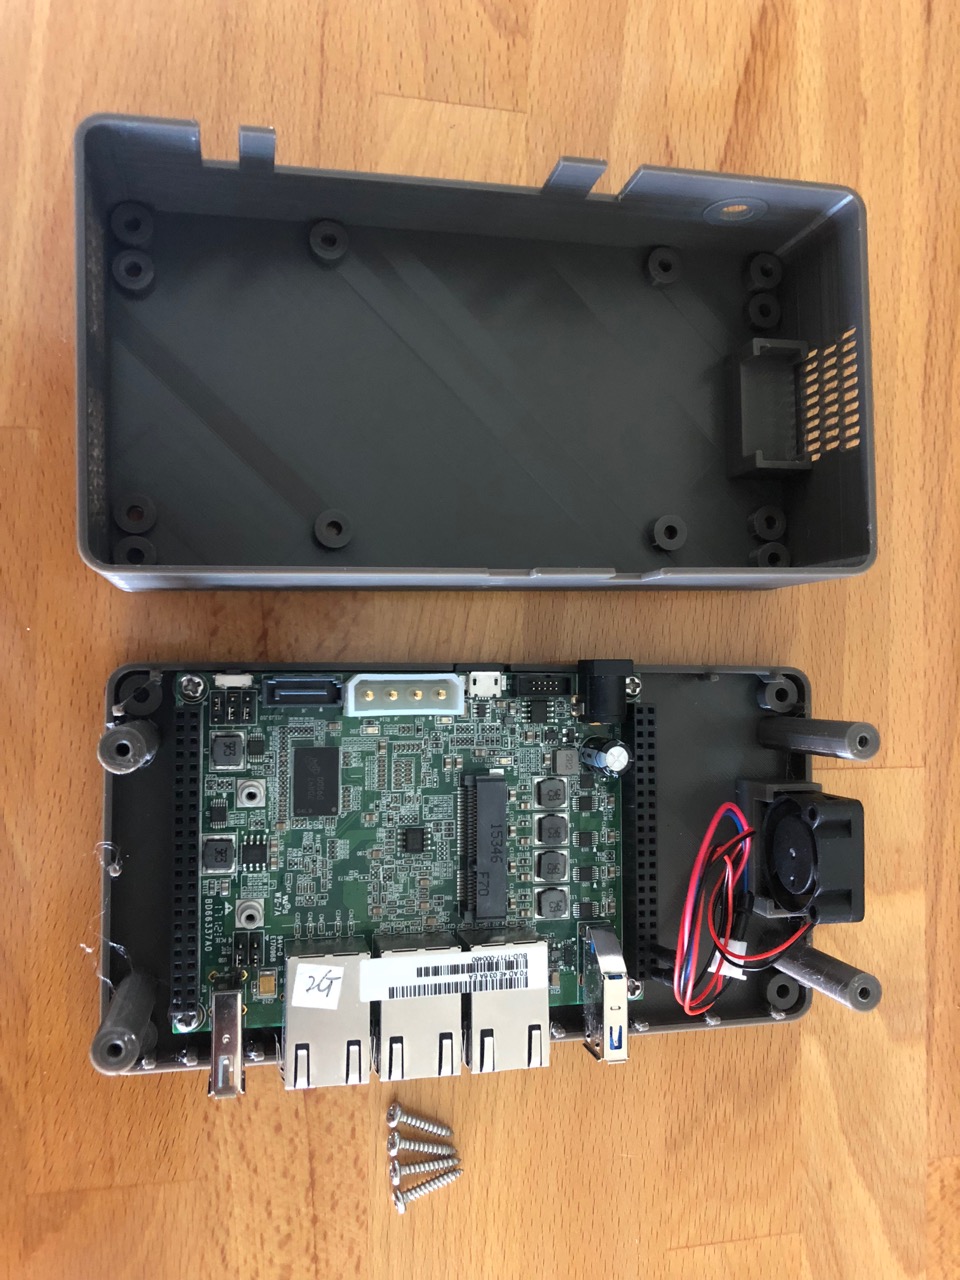


And here with fan and disk (but no LED). Here are the main parts. The disk is screwed in first, then the fan. It’s easy to connect it with some breadboard patch cables.


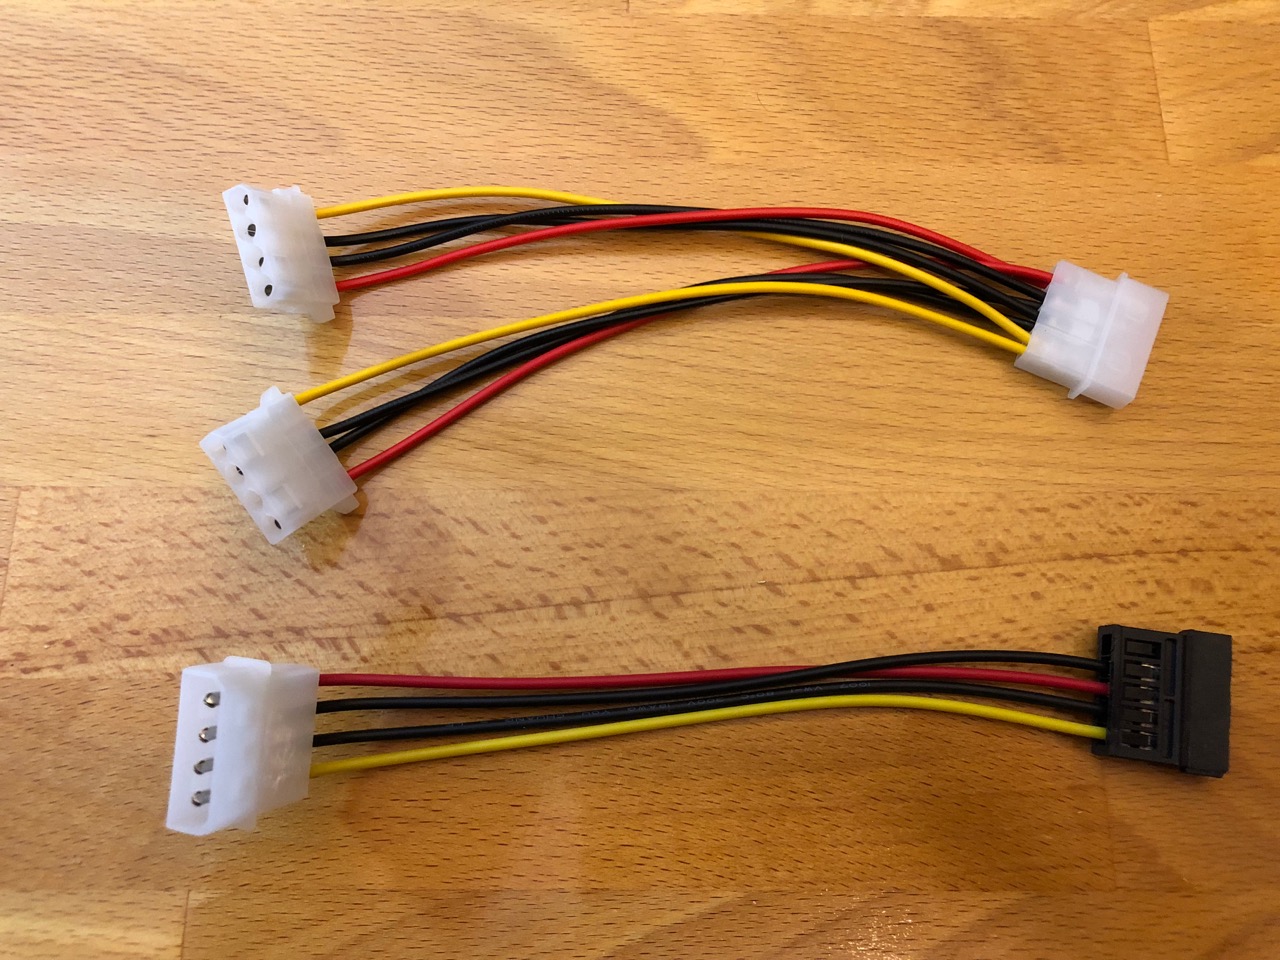
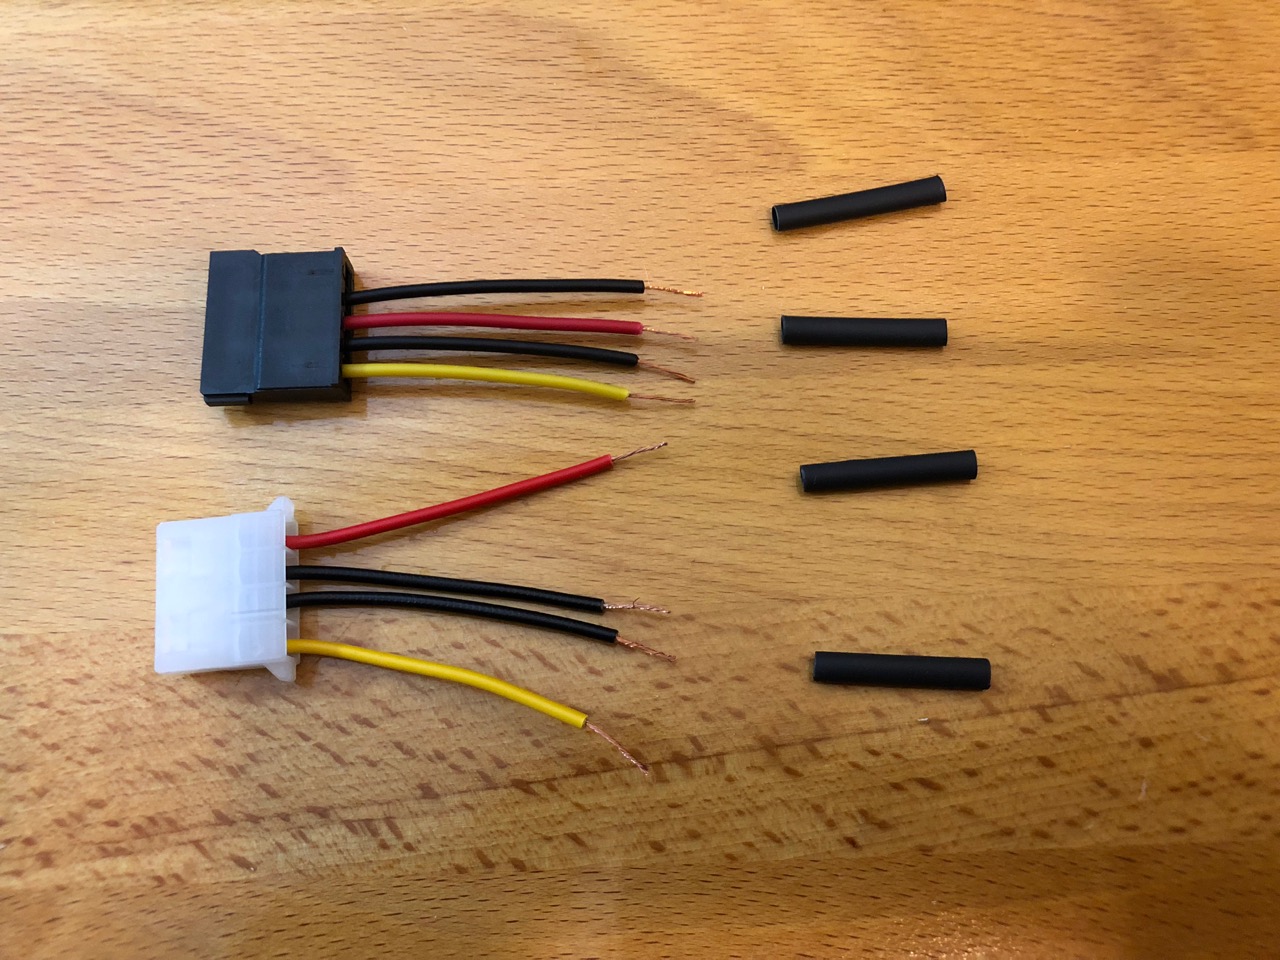
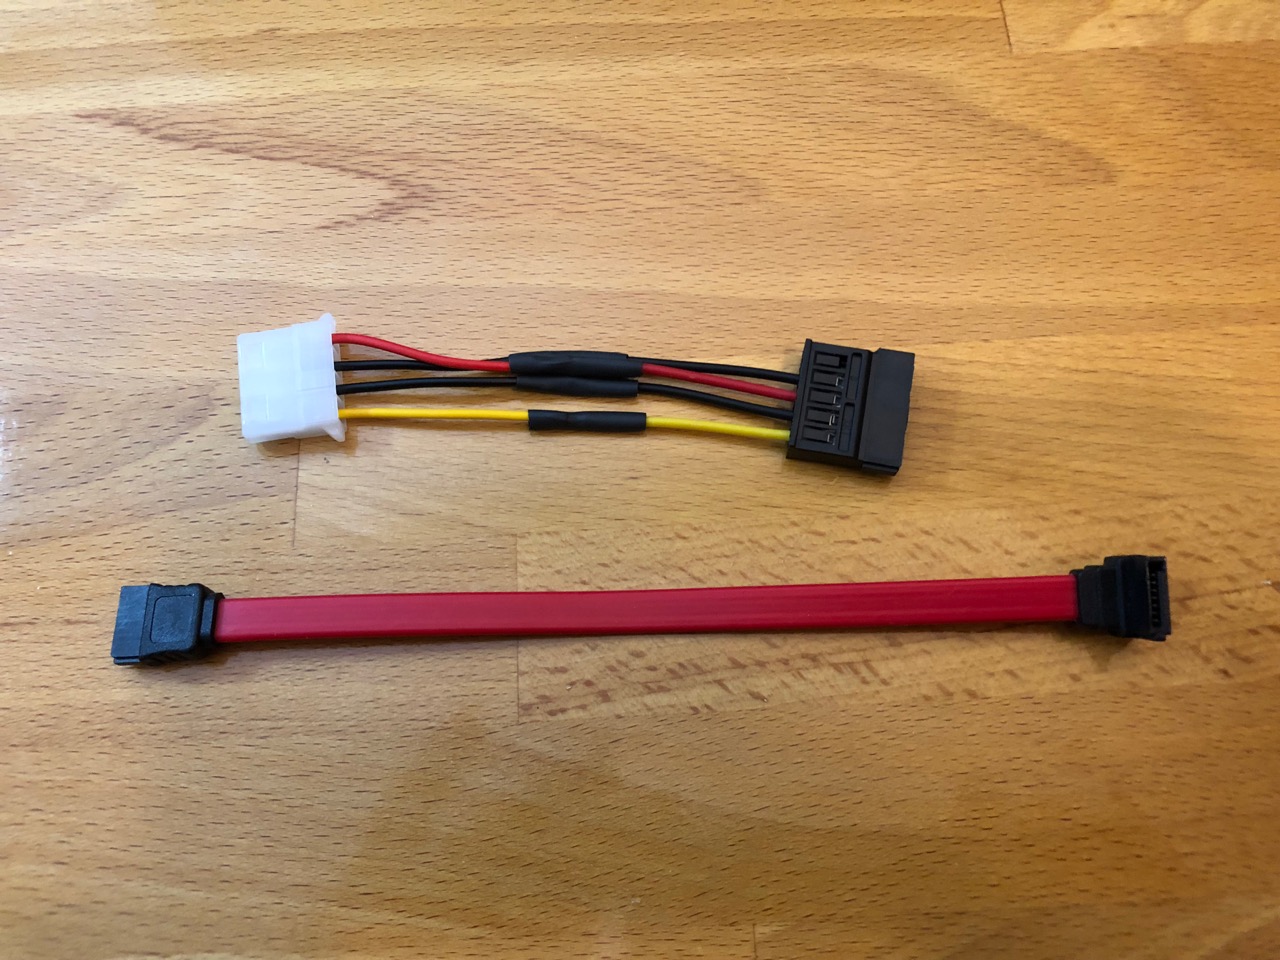
Then, the ESPRESSObin’s problem part: the power connector to the disk, because in their “wisdom”, they put the wrong connector on the board. So I recommend you buy a molex Y splitter, and a molex-to-SATA-power adapter. You can simply connect them to each other, but that gets rather bulky and there isn’t a whole lot of room in the box. I cut the connectors off I and soldered them together as we need it, protected by some heat-shrink tubing. A hack, but it works.
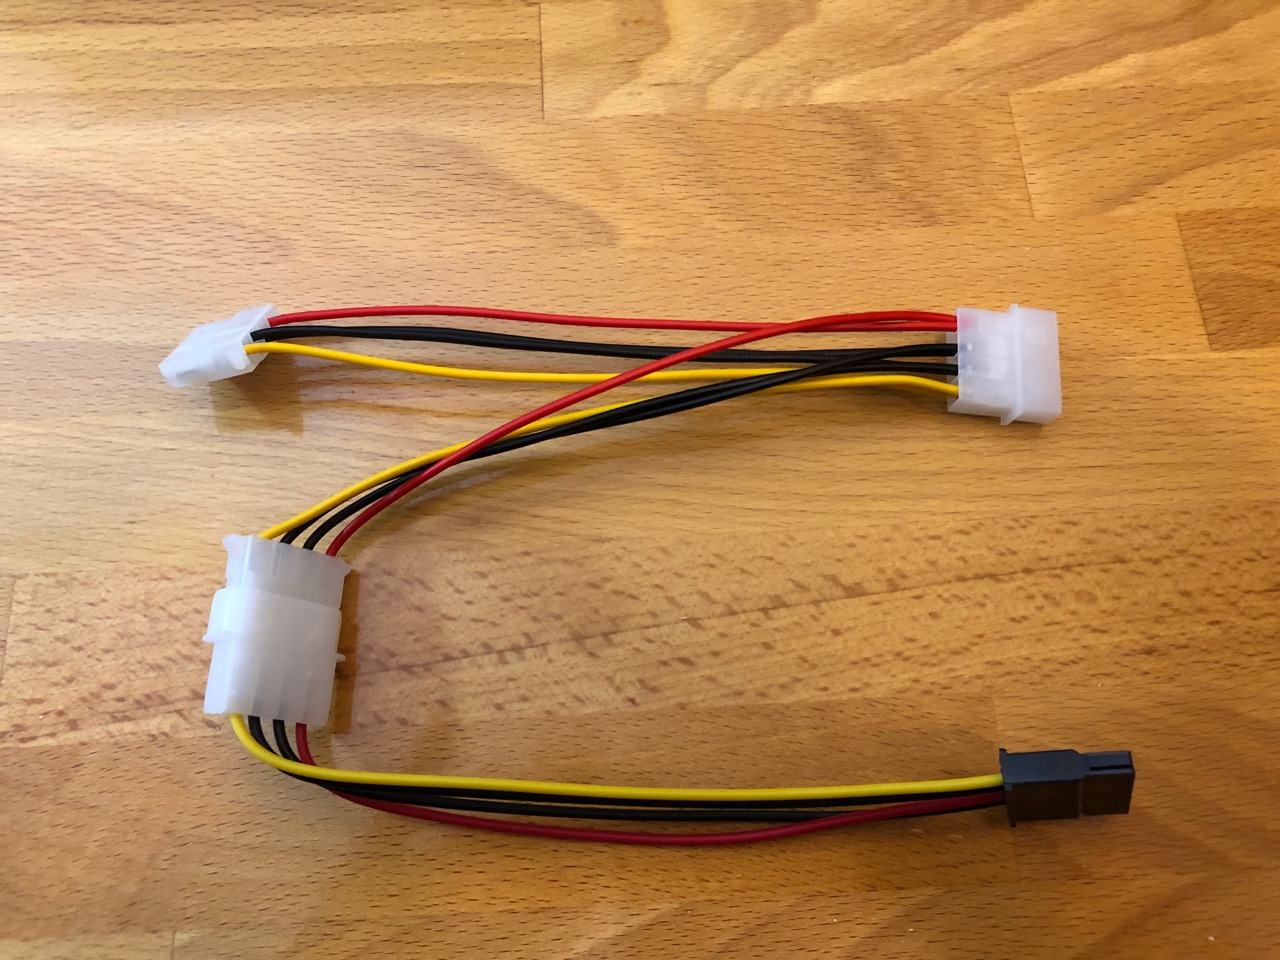

It is worthwhile to connect the cables first. Then we can screw in the disk (here, a solid state drive, but a hard drive works just as well) using screws that go through the wall and into the bottom of the drive.

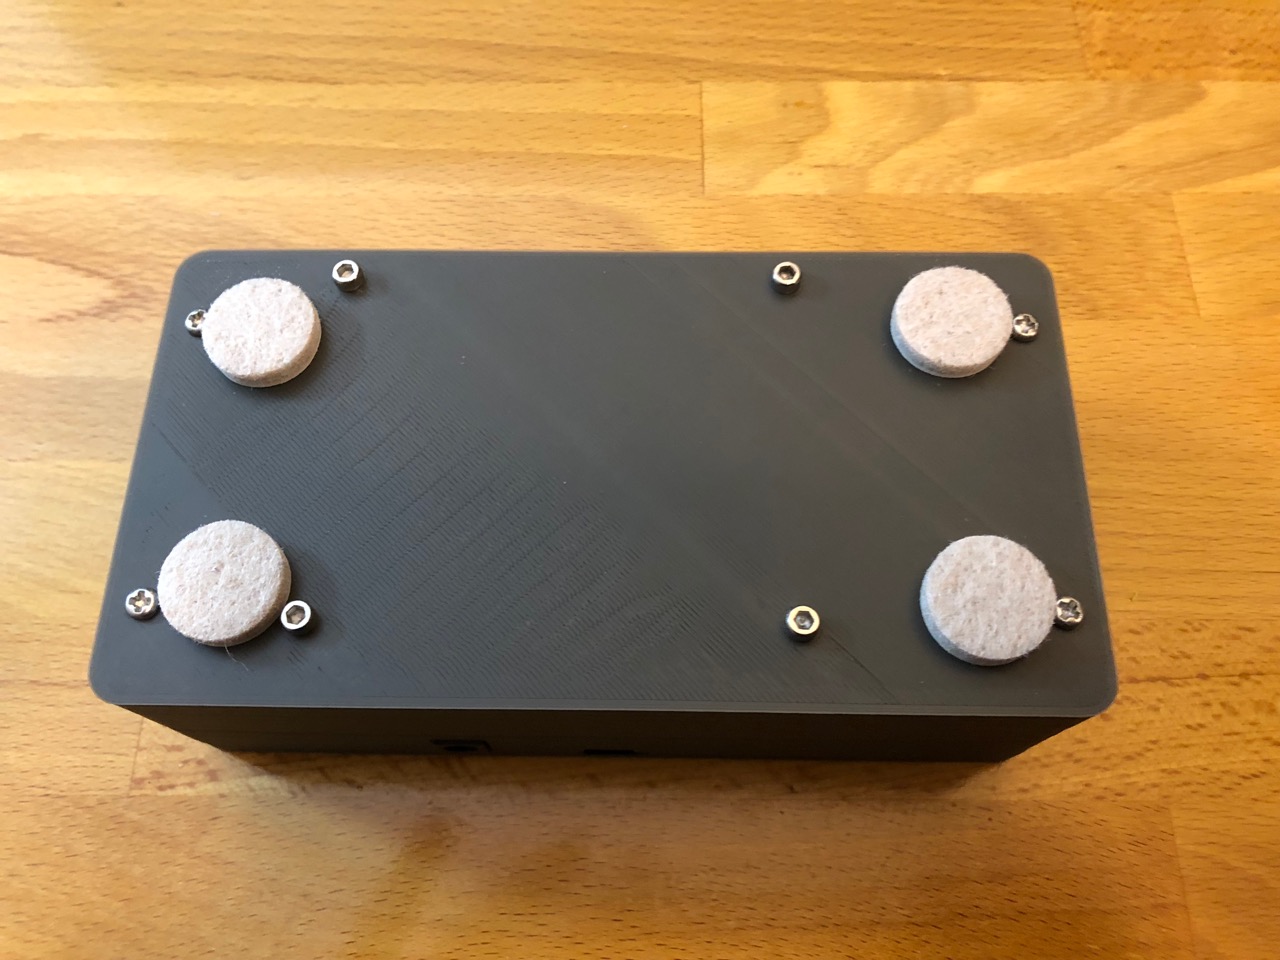
In the middle picture above you see 8 screws: the outer 4 hold the box together, and the inner ones go into the disk enclosure. If you plan to place the box on a resonant surface, like a desk, I recommend you stick some padded feet on the box: they do wonders reducing the sound of the fan.
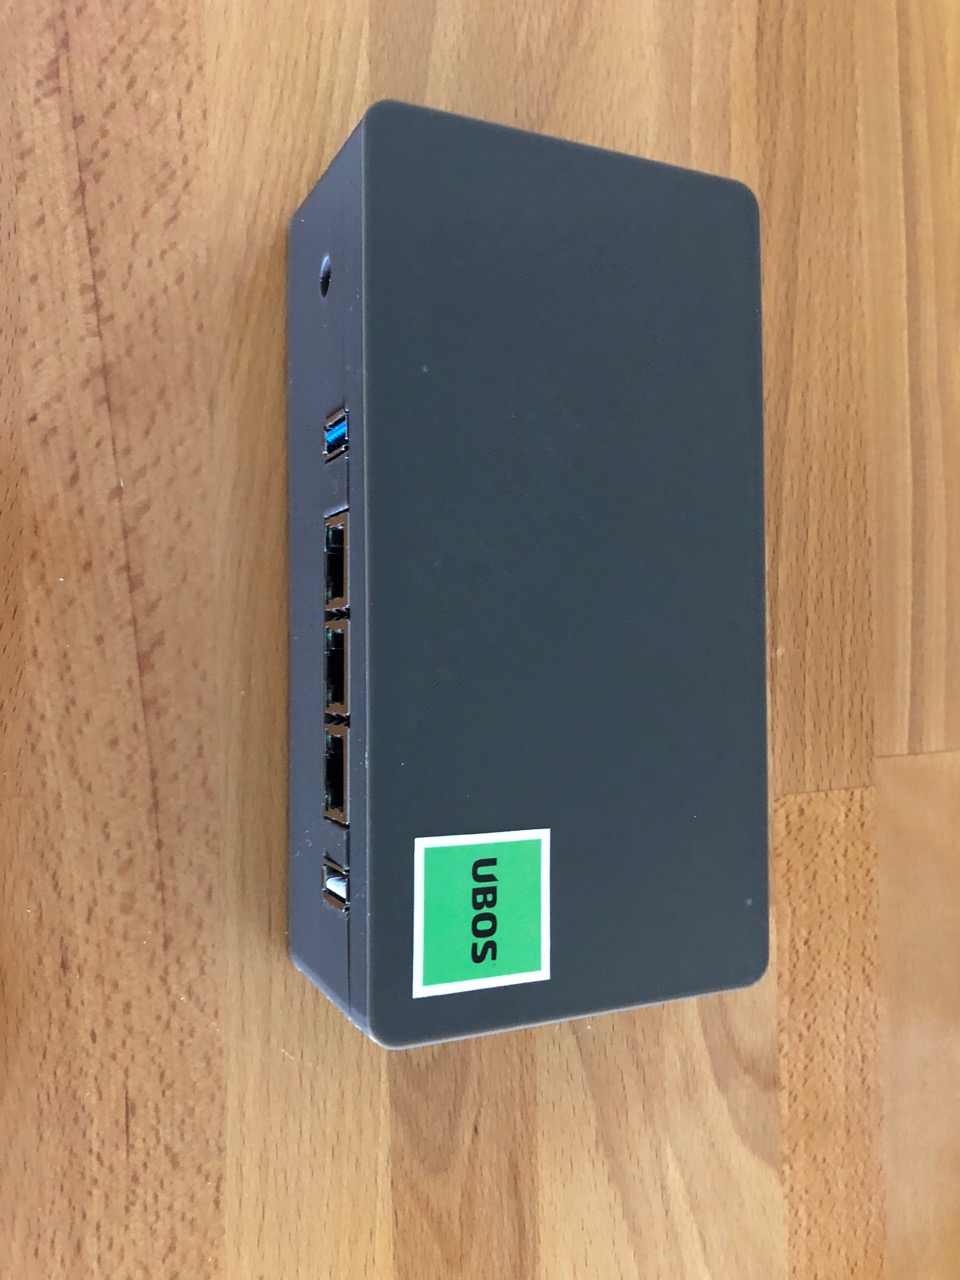
Bonus: a UBOS sticker on the top, because you are running UBOS, right? :-)